
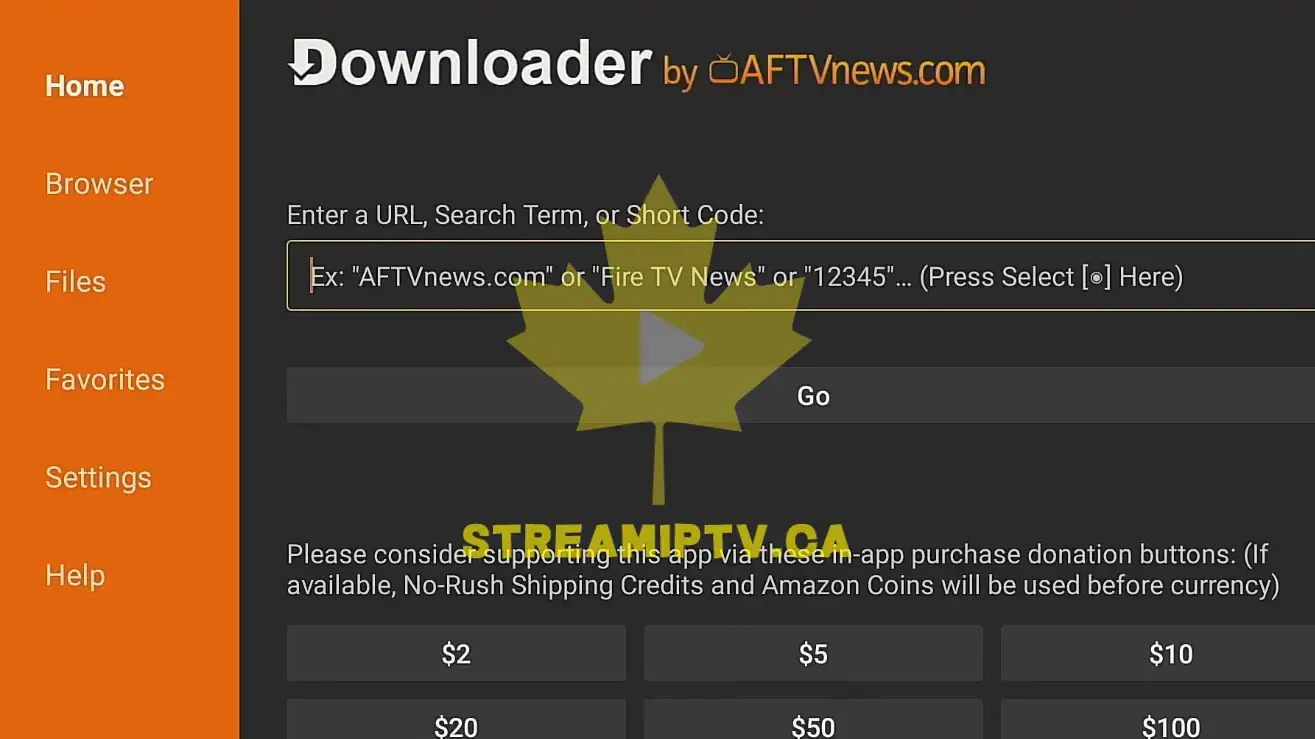
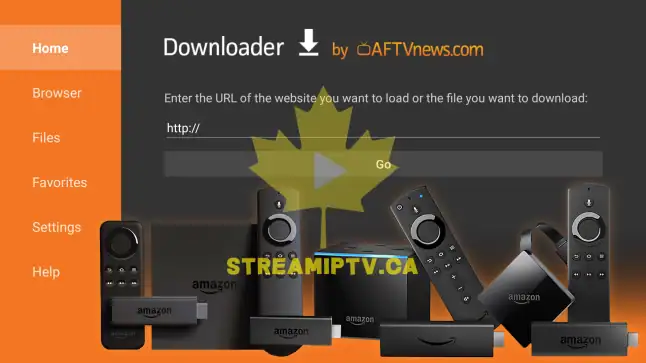
Install Downloader App on Fire TV
If you want to install apps that are not available directly from the standard Amazon catalog, the first tool most Fire TV users need is Downloader. For many beginners, the hard part is not the installation itself. The confusion usually starts when the Fire TV menus look slightly different from one device to another, when the search screen is not where expected, or when Developer Options seems to be missing. That is why this guide breaks everything into very small actions that are easy to follow.
This tutorial is written for Fire TV Stick users who want a clear, calm, and reliable method. You do not need technical experience. You only need your Fire TV remote, an internet connection, and a few minutes of setup time. By the end, Downloader will be installed and your Fire TV will also be ready to allow approved external app installations when needed.
Because Amazon updates Fire OS from time to time, some menus can move slightly. In this guide, you will see the standard route and also the alternative route used on newer Fire TV models where Developer Options is hidden until you unlock it. Follow the steps exactly in order and you should avoid the most common mistakes.
Quick Overview
- Open the app search area on your Fire TV.
- Search for Downloader.
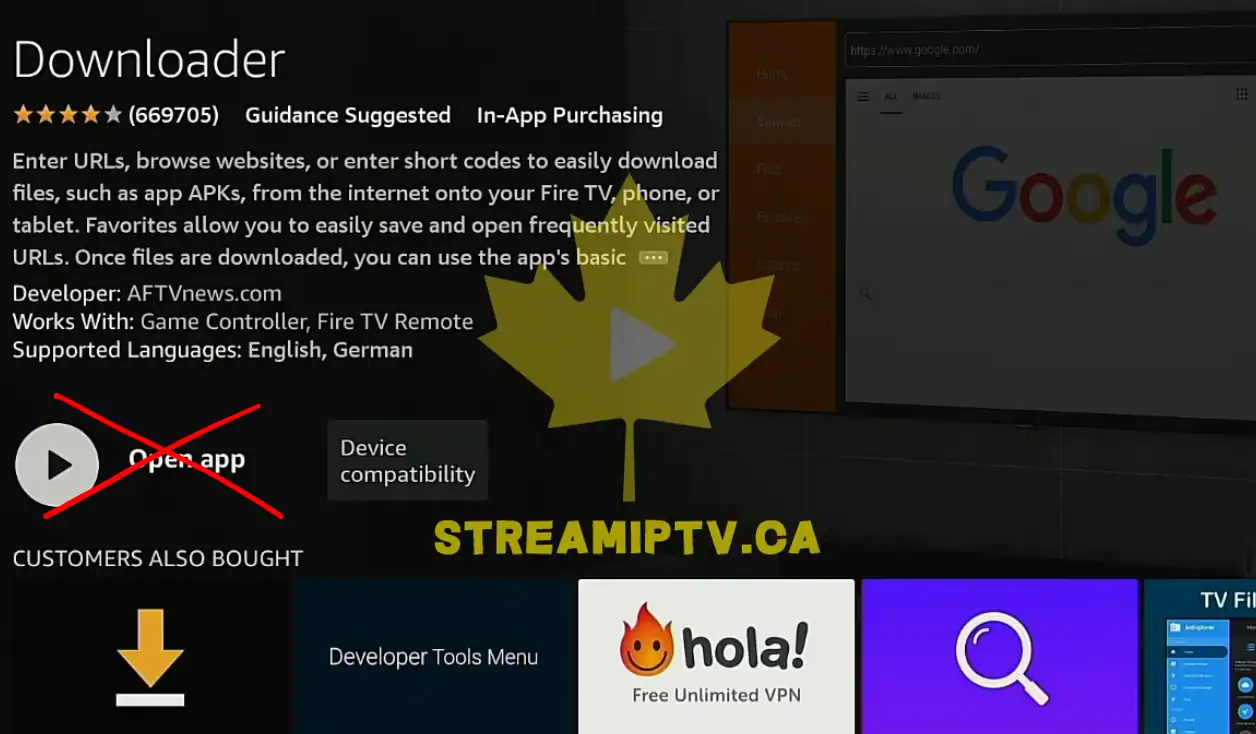
- Select Downloader by AFTVnews.
- Install the app.
- Open Settings.
- Go to My Fire TV.
- Find or unlock Developer Options.
- Allow Downloader to install external apps from unknown sources.
Preparation
Before you begin, make sure your Fire TV Stick is powered on and connected to the internet. A stable connection is important because the Amazon Appstore must load correctly before you can search for Downloader. If your Wi-Fi is weak, the search page may take longer to appear or the installation may pause.
You should also keep the Fire TV remote nearby with working batteries. Most of the setup is done with simple directional navigation, but it helps to move slowly and confirm each screen before pressing the next button.
Here is what you need before starting:
- A Fire TV Stick or other Fire TV device
- An active Amazon account already signed in on the device
- A working internet connection
- Your Fire TV remote
- A few minutes without interrupting the setup
If you live in Canada and your connection is shared across many devices in the home, such as in a condo or apartment building with heavy evening Wi-Fi congestion, it is a good idea to do this setup near the router or at a quiet network time. This does not usually affect the installation itself, but it can make app pages load faster.
Ultra Step-By-Step Tutorial
Step 1: Turn on the TV
Press the power button for your television if it is not already on.
You should see either your TV input screen or the Fire TV home screen.
Step 2: Switch to the Fire TV input
Use your TV remote if needed and select the HDMI input connected to the Fire TV Stick.
Once selected, the Fire TV interface should appear.
Step 3: Wait for the home screen to finish loading
Do not press anything yet. Give the home screen a moment to load fully.

You should see the main navigation row and app recommendations.
Step 4: Hold the Fire TV remote normally
Make sure you can access the directional ring, the center select button, and the back button comfortably.
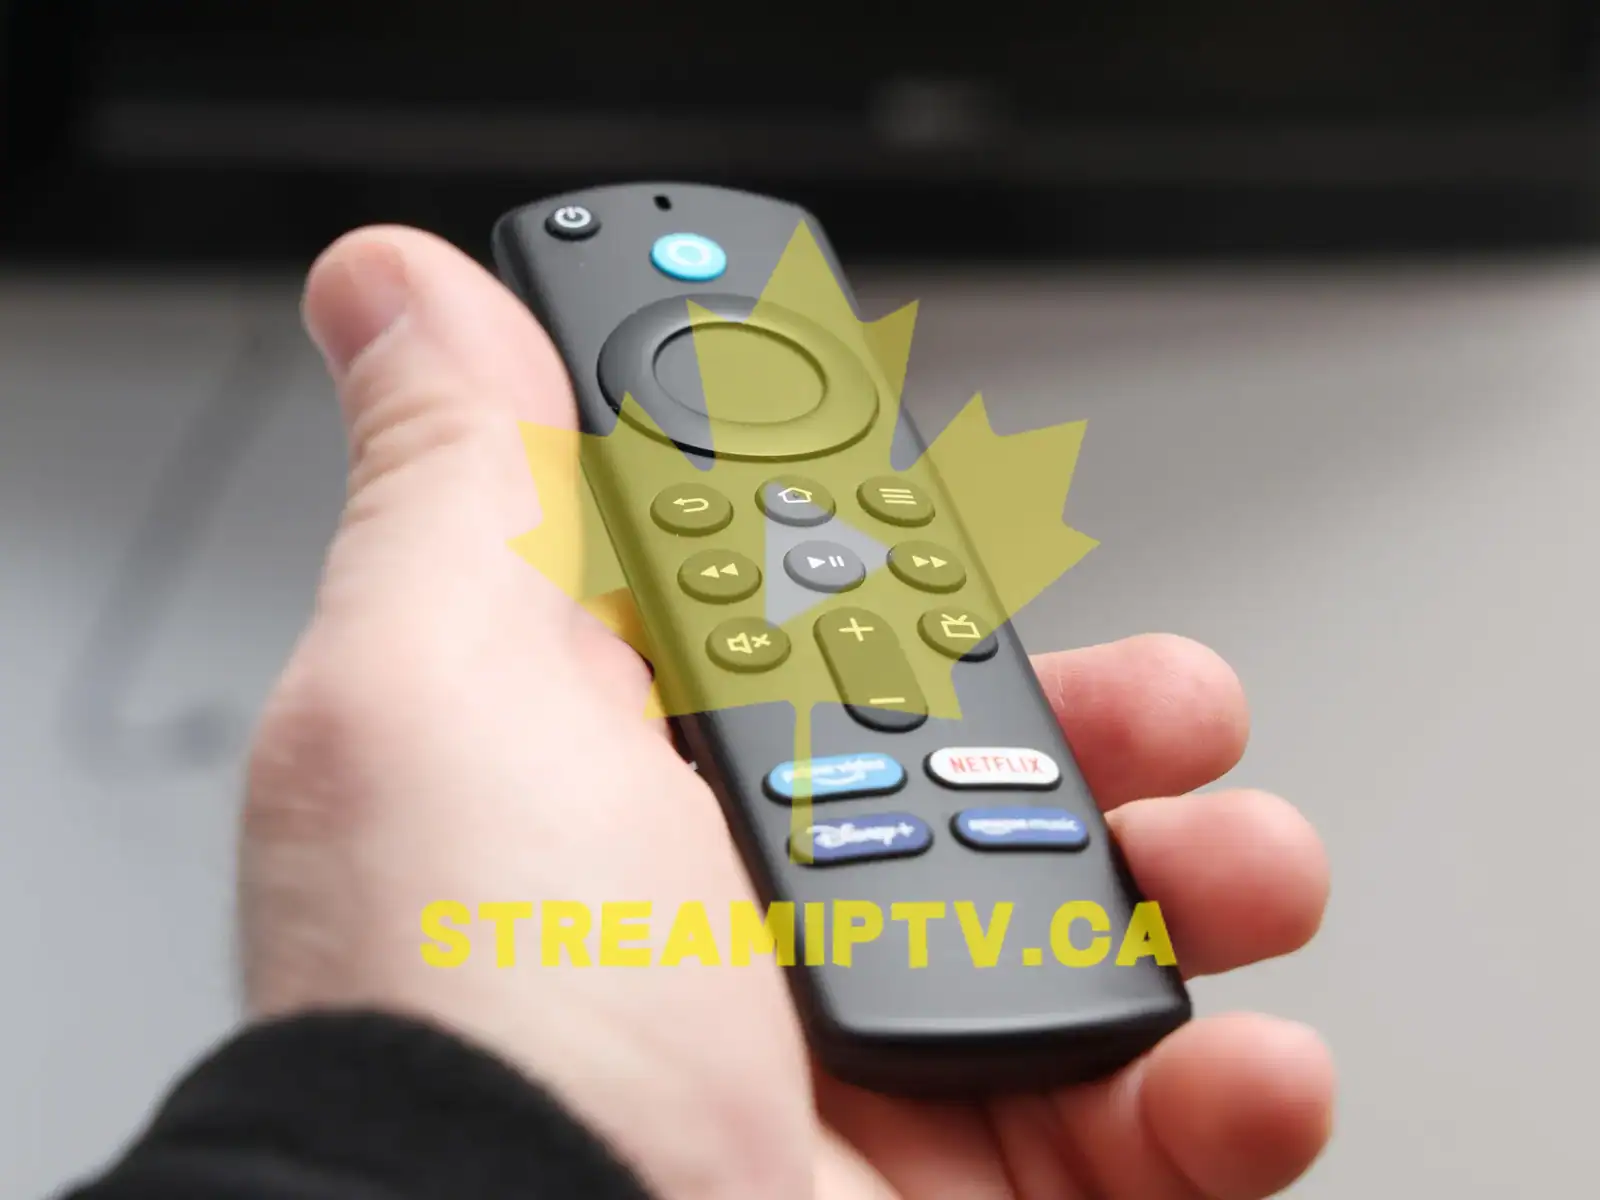
You will use these buttons throughout the setup.
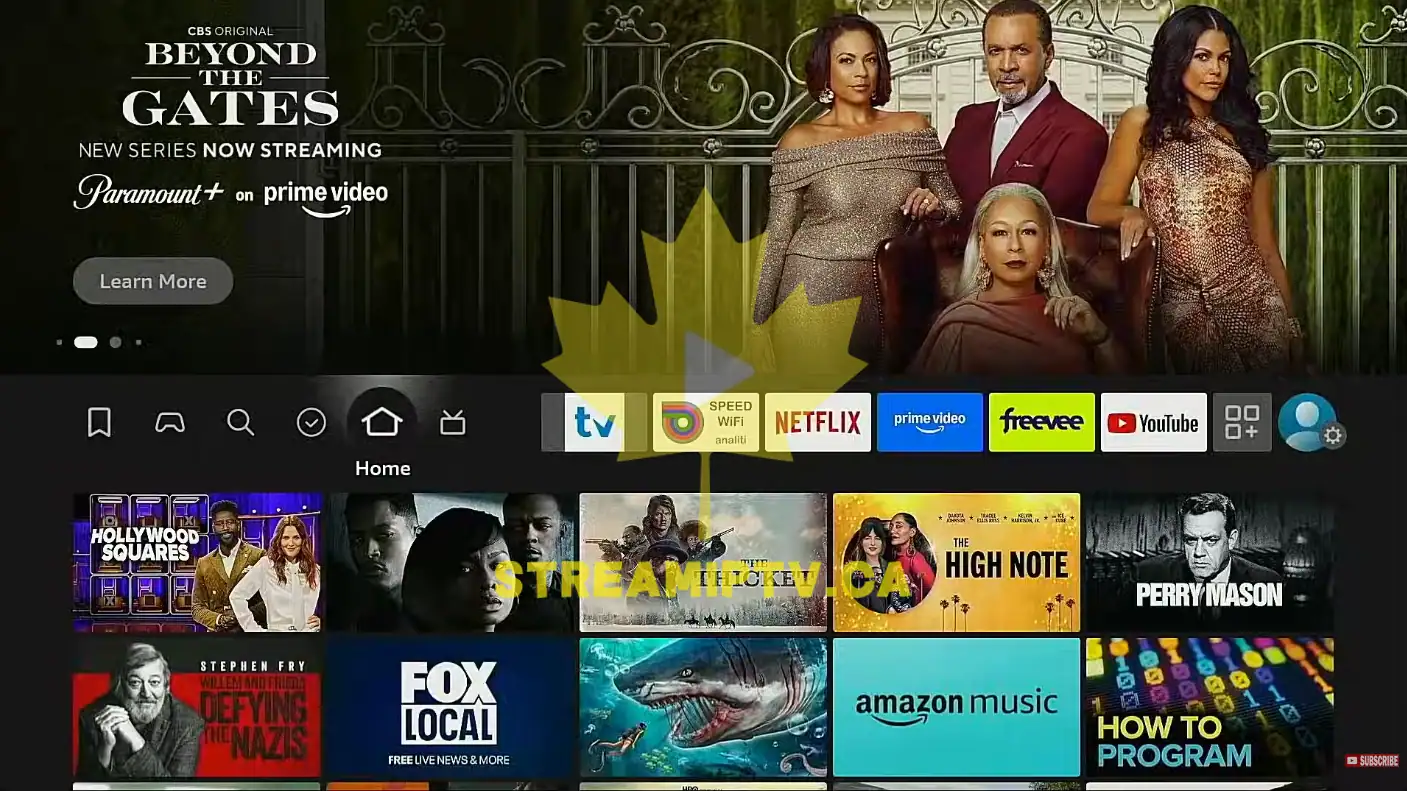
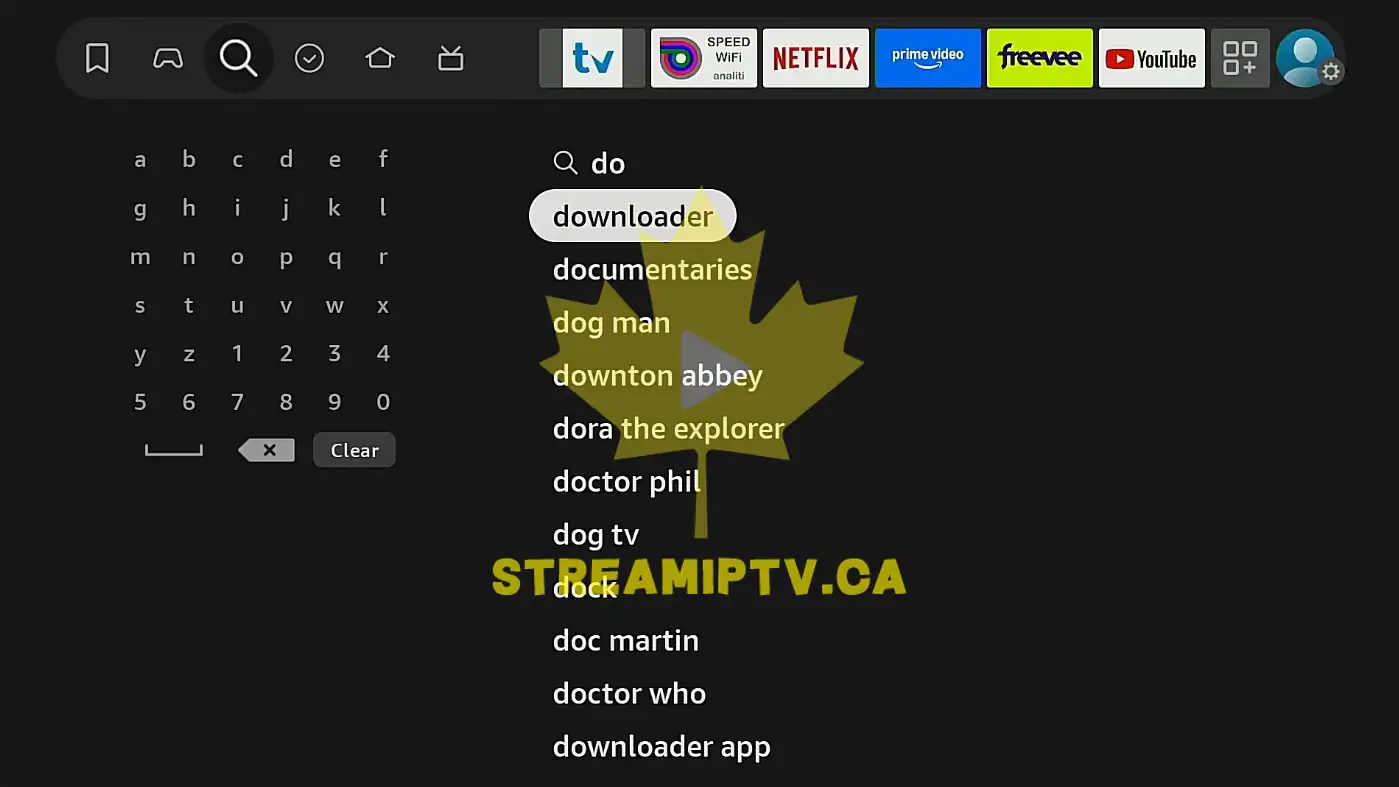
Step 5: Go to the Find or Search area
From the Fire TV home screen, move to the top navigation and highlight Find or the search icon, depending on your Fire OS version.
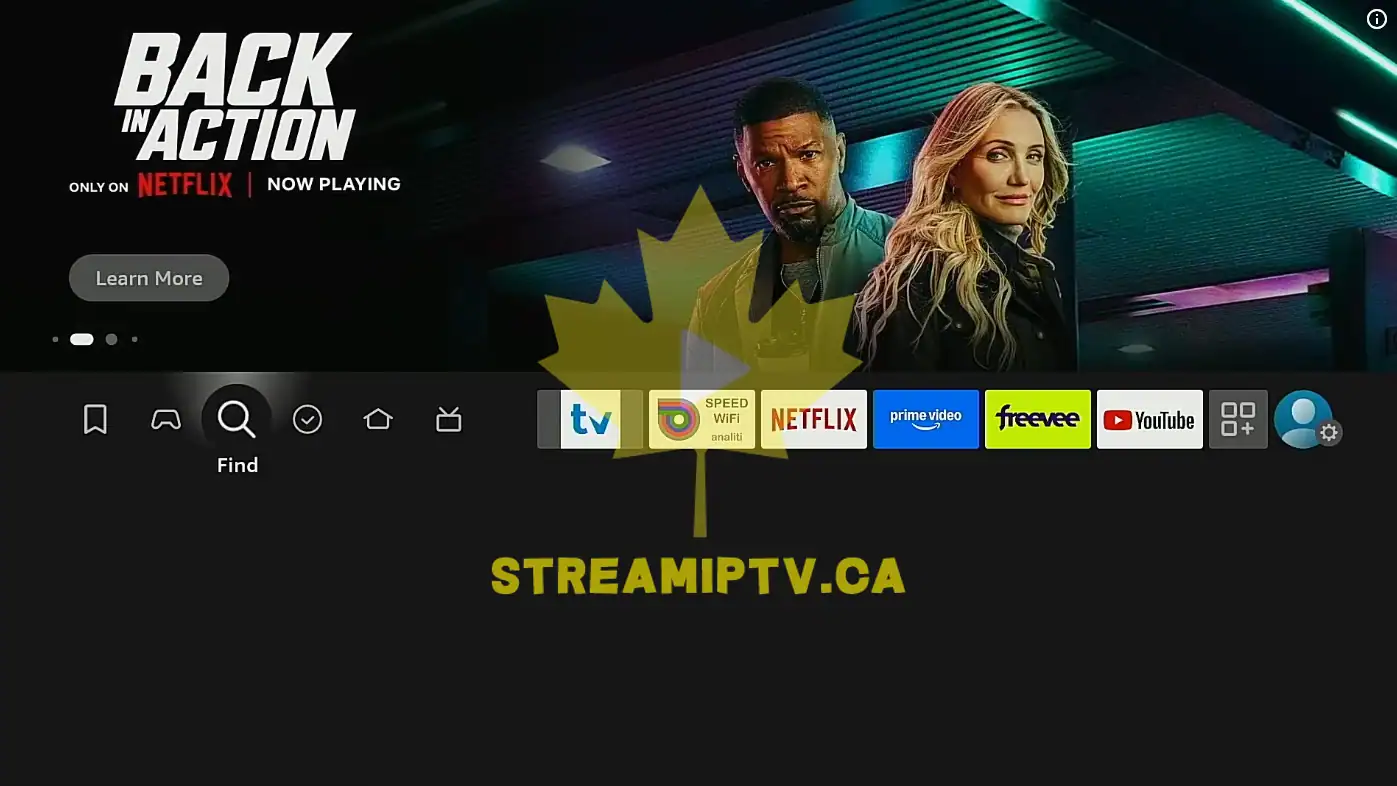
Some devices show Find. Others show a magnifying glass icon.
Step 6: Open the search function
Press the center button on the remote to enter the search page.
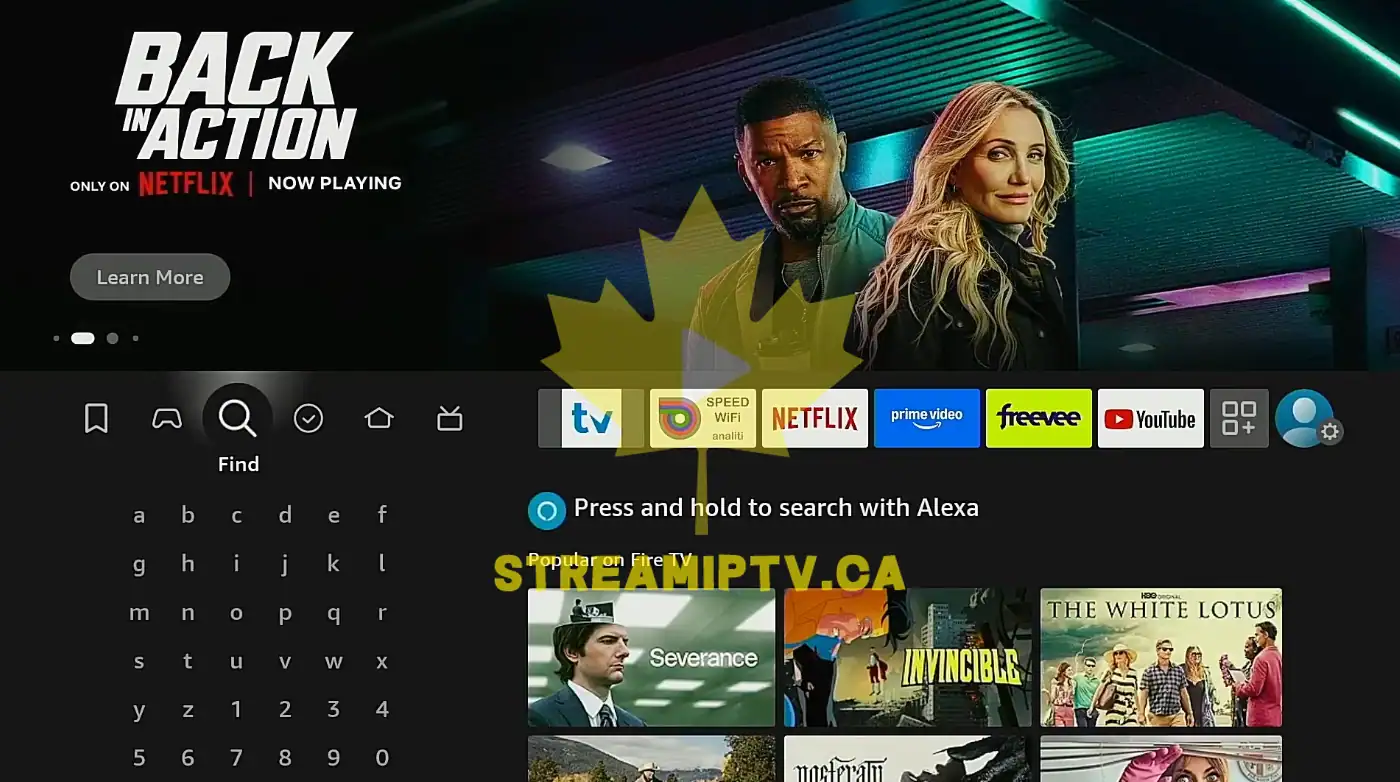
You should now see an on-screen keyboard or search suggestions.
Step 7: Highlight the on-screen keyboard
Move the selection to the first letter area if it is not already active.
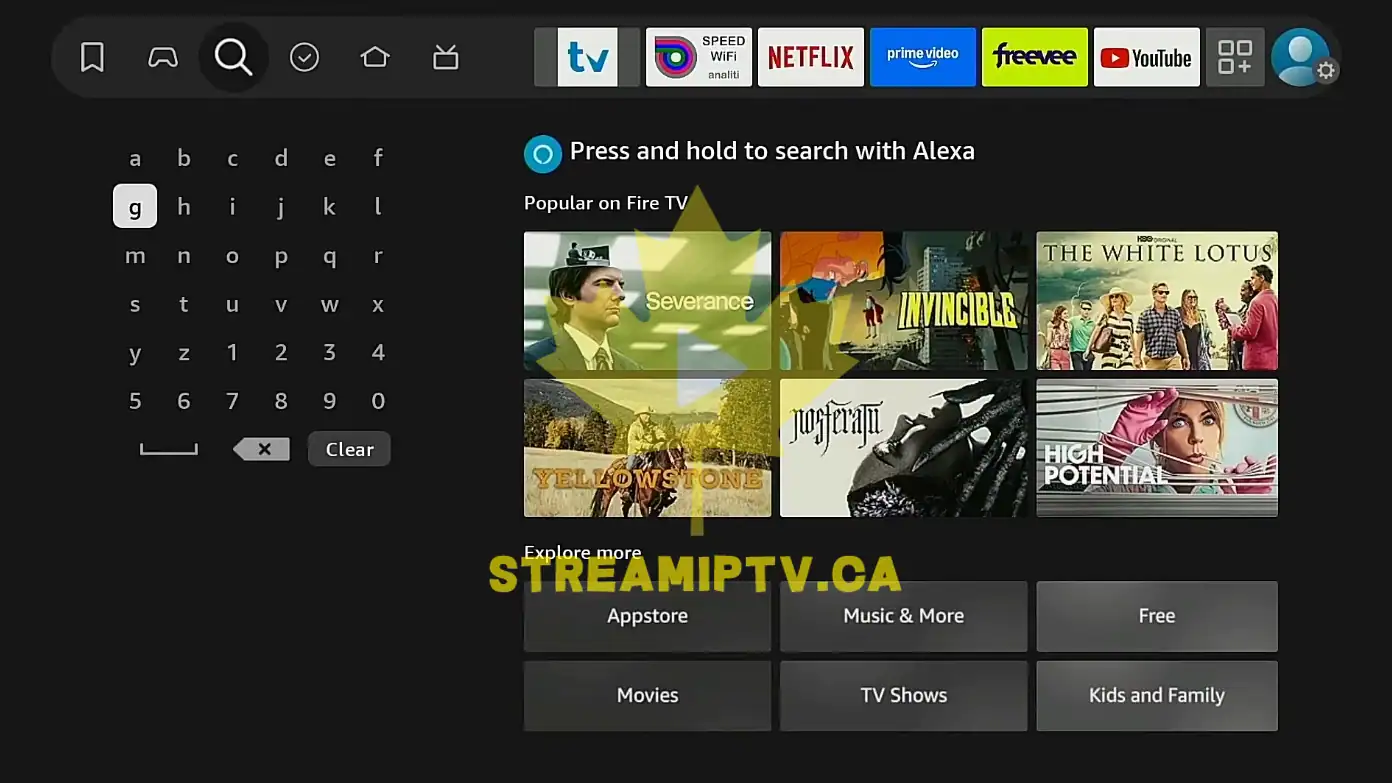
You are now ready to type the app name.
Step 8: Type the letter D
Use the remote to select the letter D.
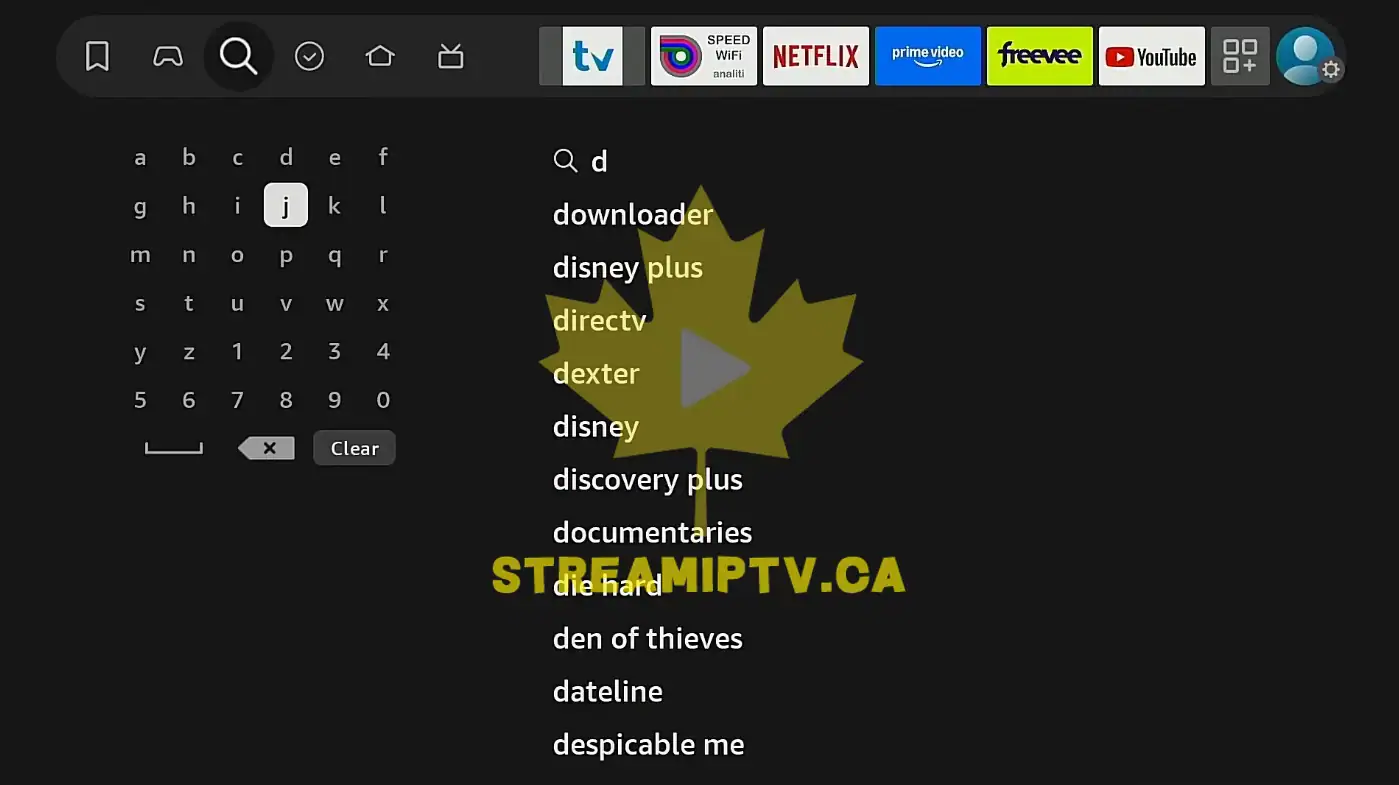
Search suggestions may begin to appear immediately.
Step 9: Type the next letters
Continue entering the word Downloader one letter at a time.

You do not have to rush. Let the suggestions update as you type.
Step 10: Check the suggestions list
Watch the right side or lower part of the screen for matching search results.
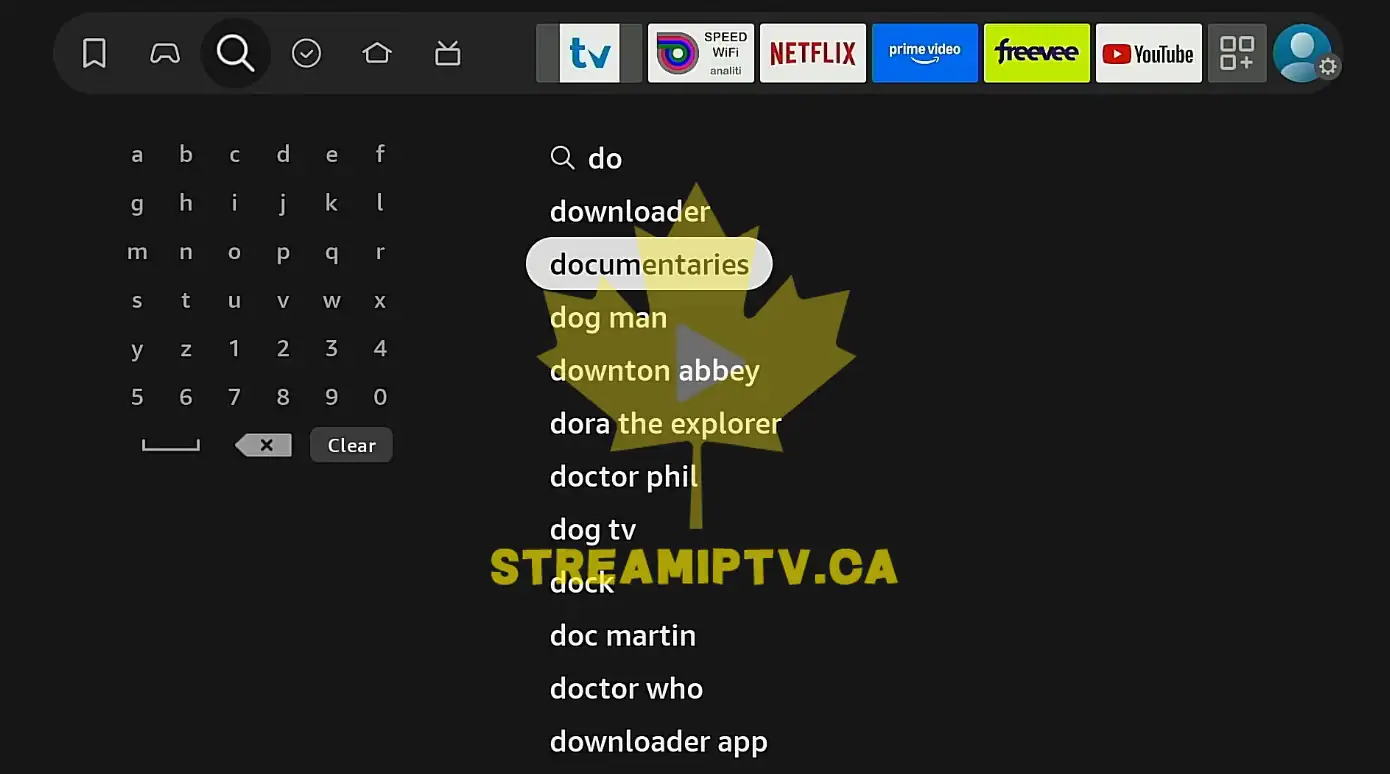
You should start seeing Downloader appear in the results.
Step 11: Select Downloader from the search results
Highlight the Downloader app result and press the center button.
This should open the app details page.
Step 12: Confirm the publisher name
On the app page, look for the app name Downloader and the publisher AFTVnews.
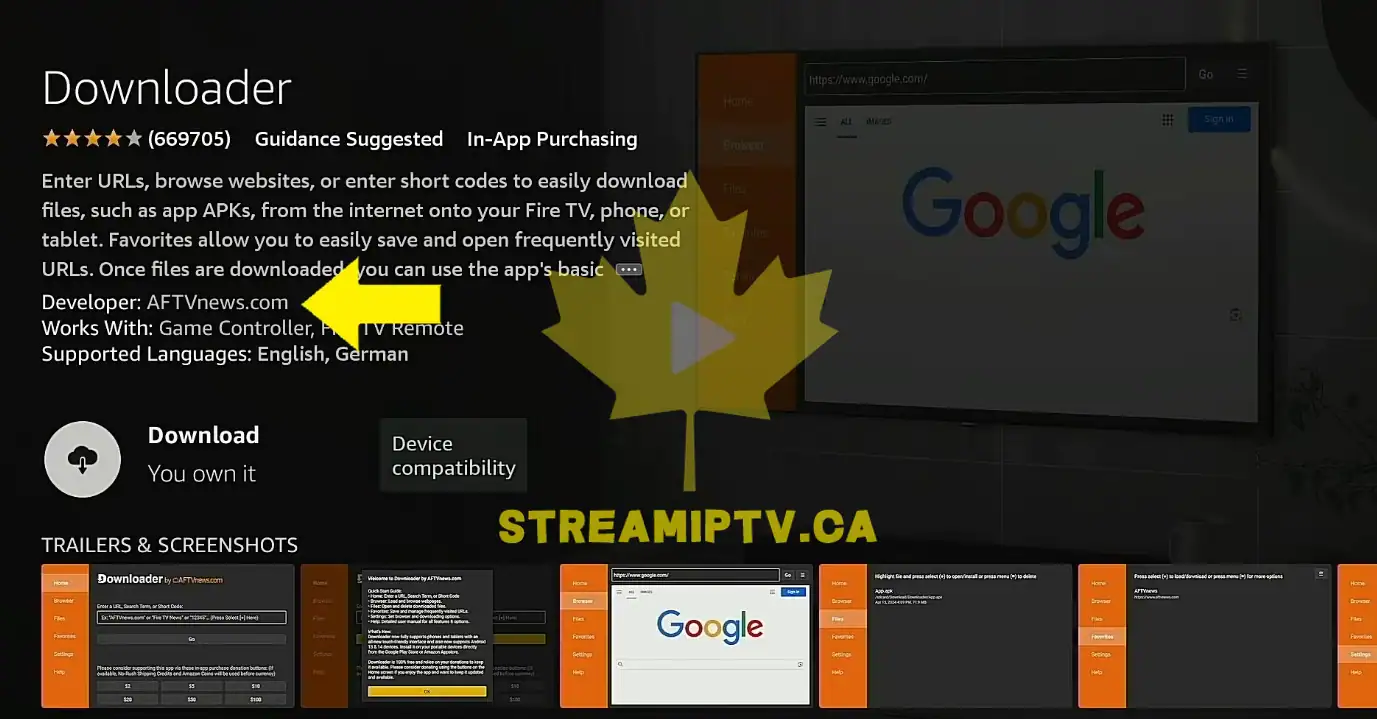
This helps you avoid installing the wrong app with a similar name.
Step 13: Review the install button
Look for a button labeled Get, Download, or a cloud icon, depending on your account history.

The button wording can differ, but it serves the same purpose.
Step 14: Start the installation
Press the center button on Get or Download.

The Fire TV will now begin downloading the app.
Step 15: Wait while the download begins
Do not leave the page yet. Let the progress indicator move.
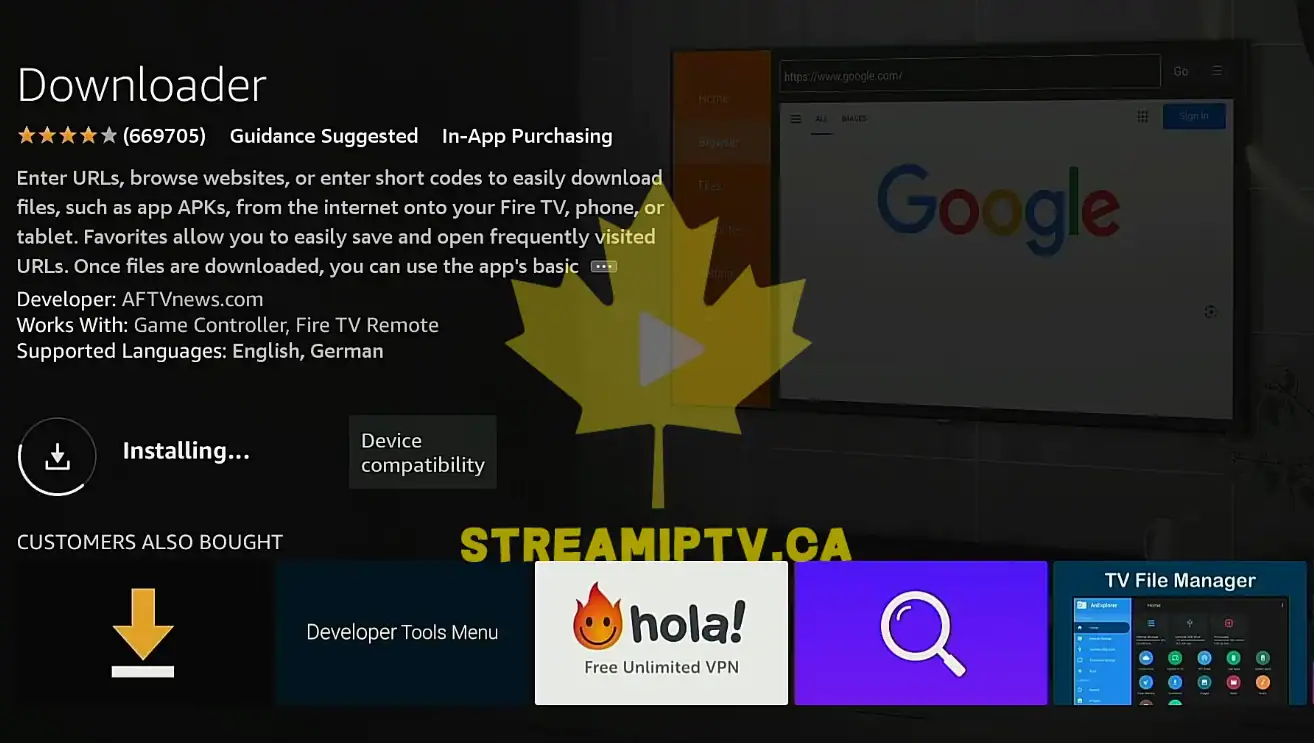
You may see a status message such as downloading or installing.
Step 16: Wait while the installation finishes
Keep waiting until the install process completes.
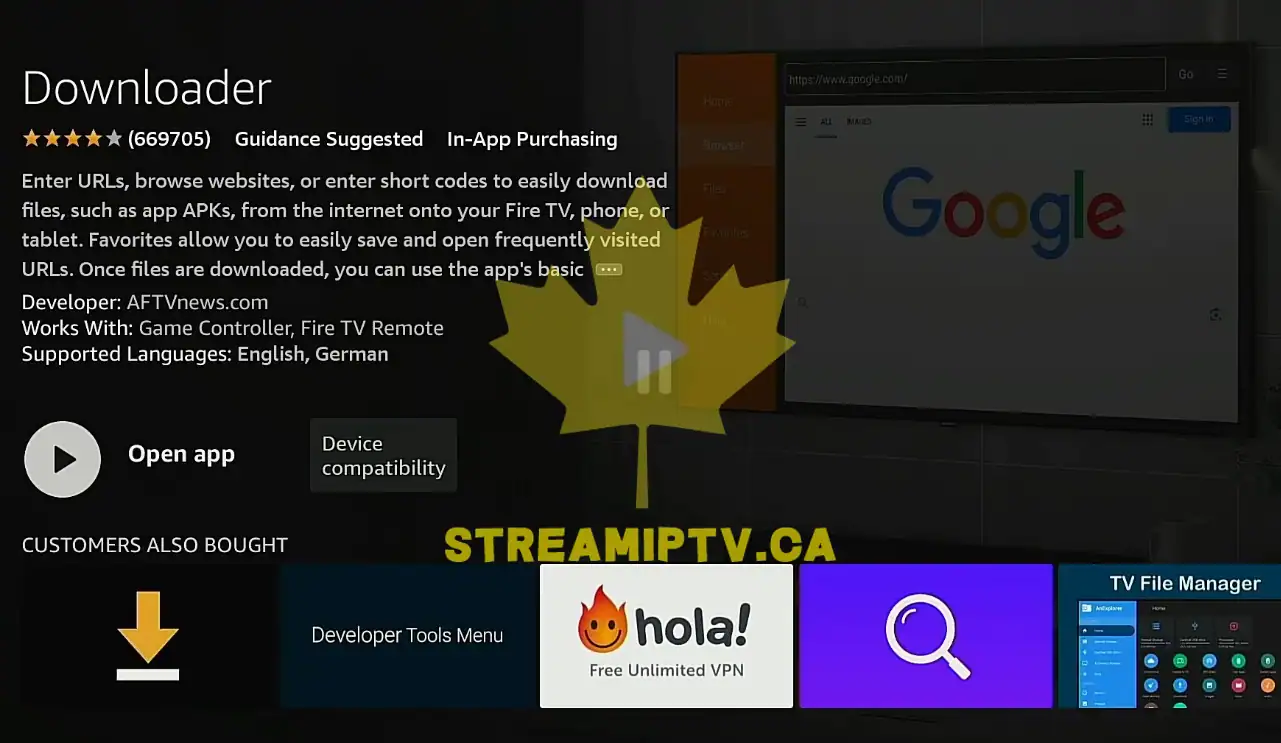
When the app is fully installed, the button usually changes to Open.
Step 17: Do not open Downloader yet
Leave the app closed for the moment.
This makes it easier to complete the security permission settings first.
Step 18: Press the Home button
Press the Home button on the remote to return to the Fire TV home screen.

You should now be back on the main Fire TV interface.
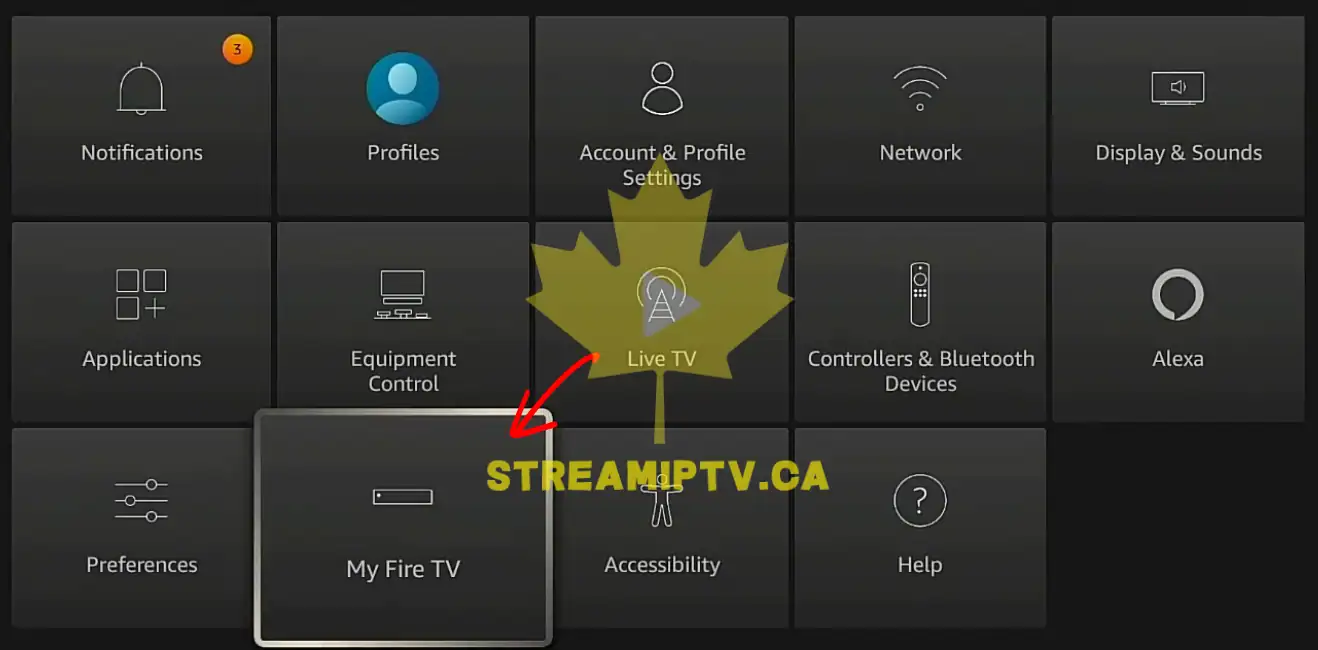
Step 19: Move to Settings
Go to the top menu and highlight Settings.
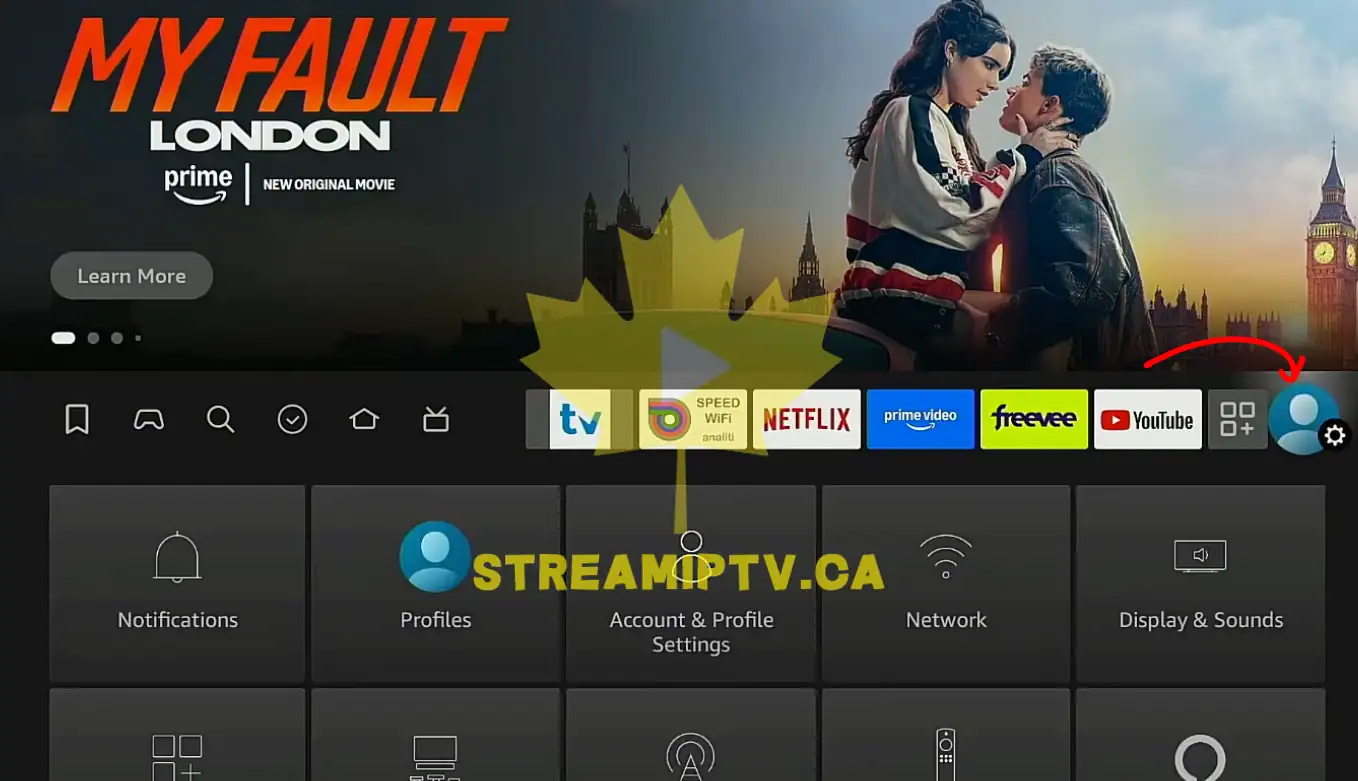
On most devices, Settings appears as a gear icon.
Step 20: Open Settings
Press the center button to enter the settings menu.
You should now see several device management categories.
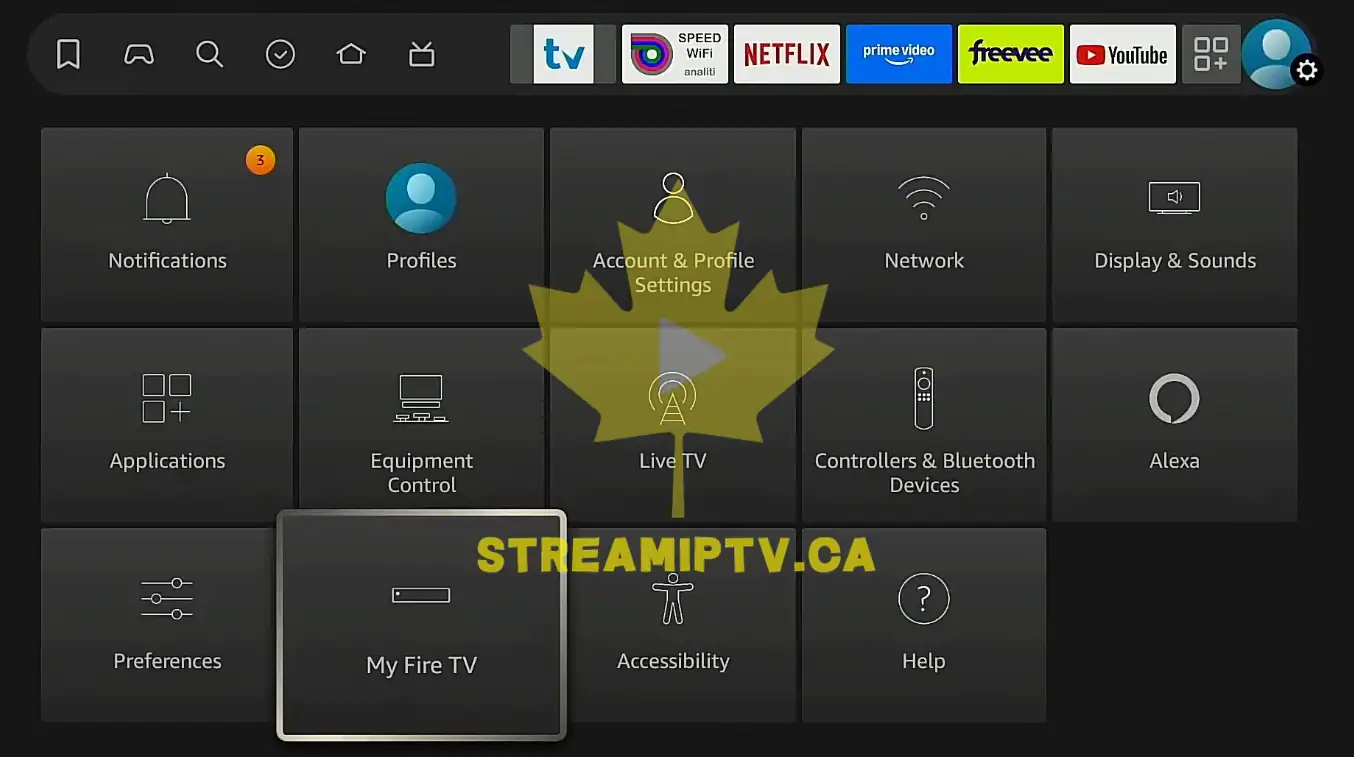
Step 21: Find My Fire TV
Scroll through the settings options until you see My Fire TV.
On some versions, it may be placed toward the right side of the menu row.
Step 22: Open My Fire TV
Press the center button on My Fire TV.
You should now see options related to device information and developer tools.
Step 23: Look for Developer Options
Scan the list and check whether Developer Options is already visible.
Older Fire TV versions may show it immediately.
Step 24: Open Developer Options if visible
If you can already see Developer Options, select it now.
If it is not visible, continue to the next step to unlock it.
Step 25: Return to the My Fire TV screen if needed
If you entered another screen by mistake, press Back until you are again inside My Fire TV.
You need to be on the correct menu before unlocking Developer Options.
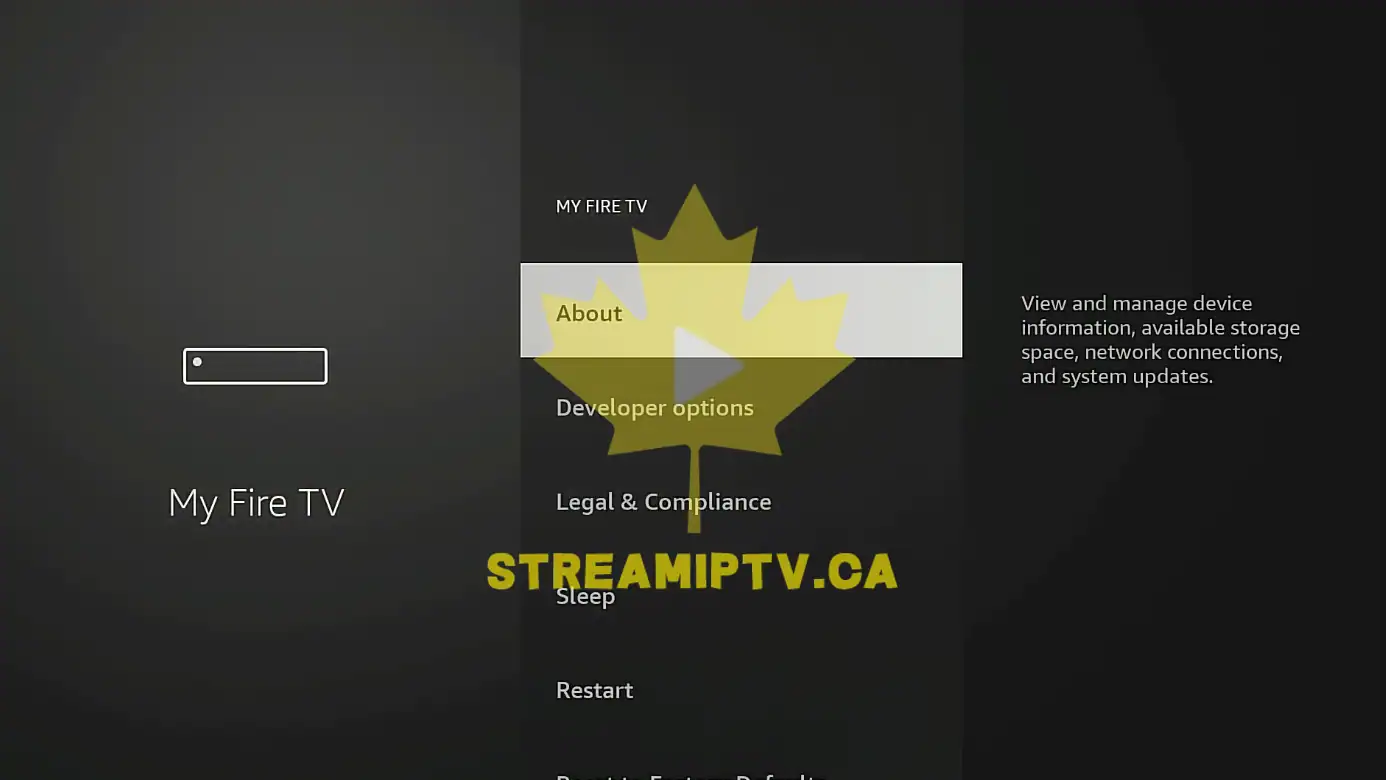
Step 26: Highlight About
Select About inside the My Fire TV menu.
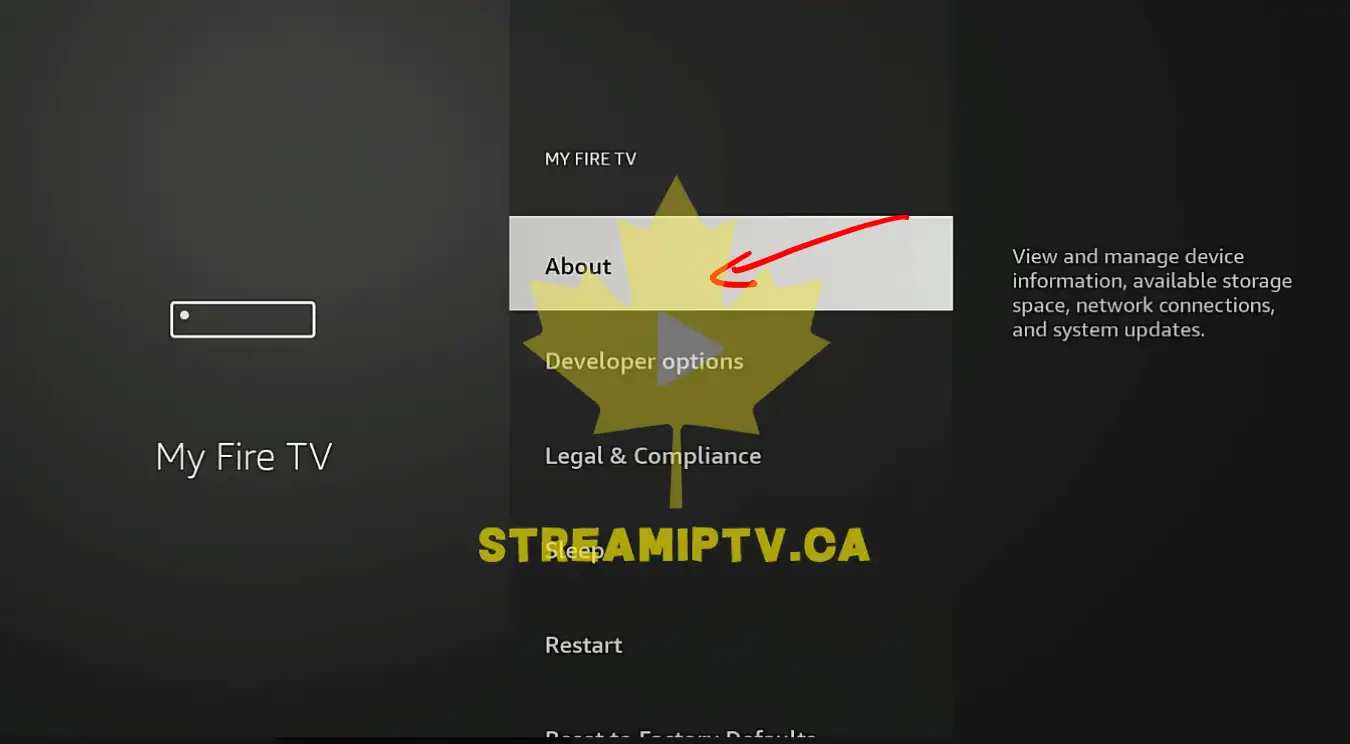
This is the menu used on newer models to reveal Developer Options.
Step 27: Open About
Press the center button on About.
You should now see your device name and system details.
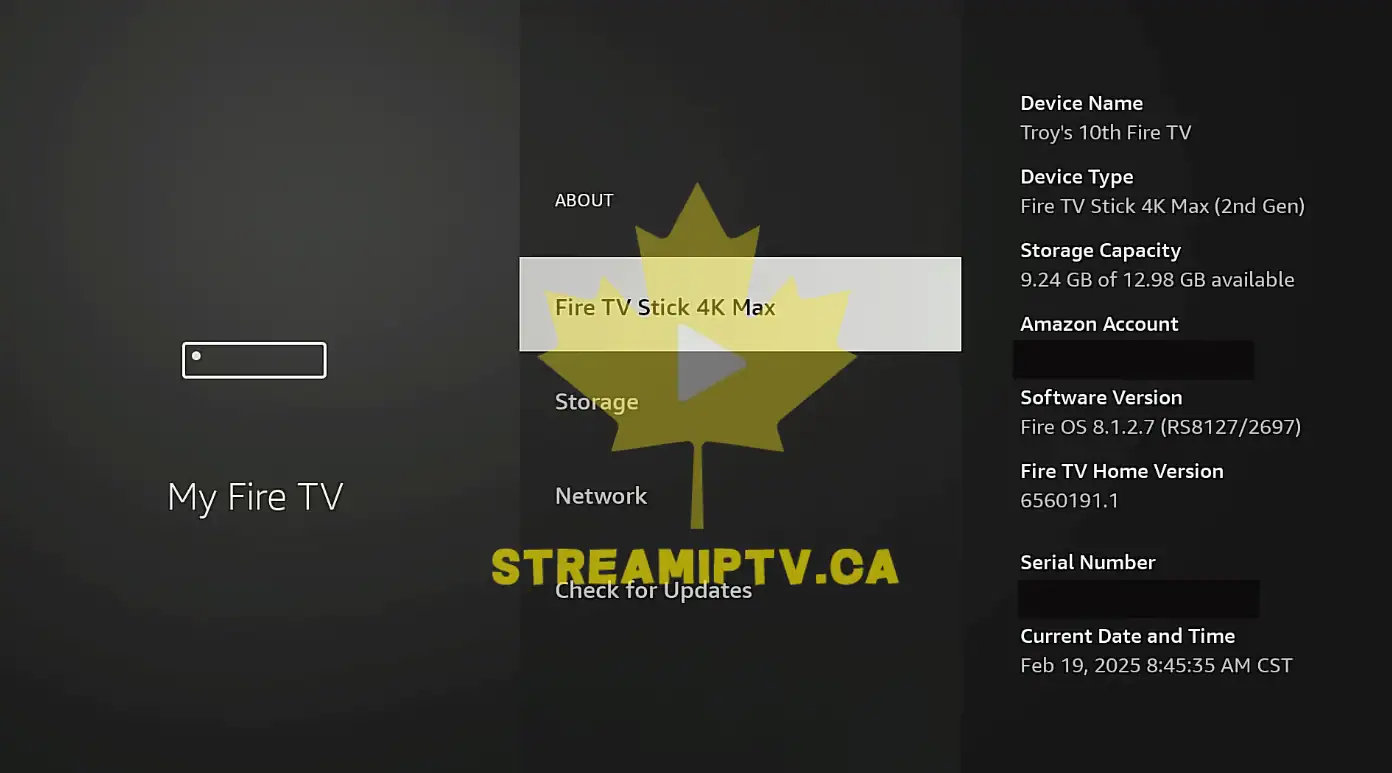
Step 28: Highlight the device name
Move the selection to the line that shows your Fire TV device name.
The highlighted row is the one you will use to unlock the hidden menu.
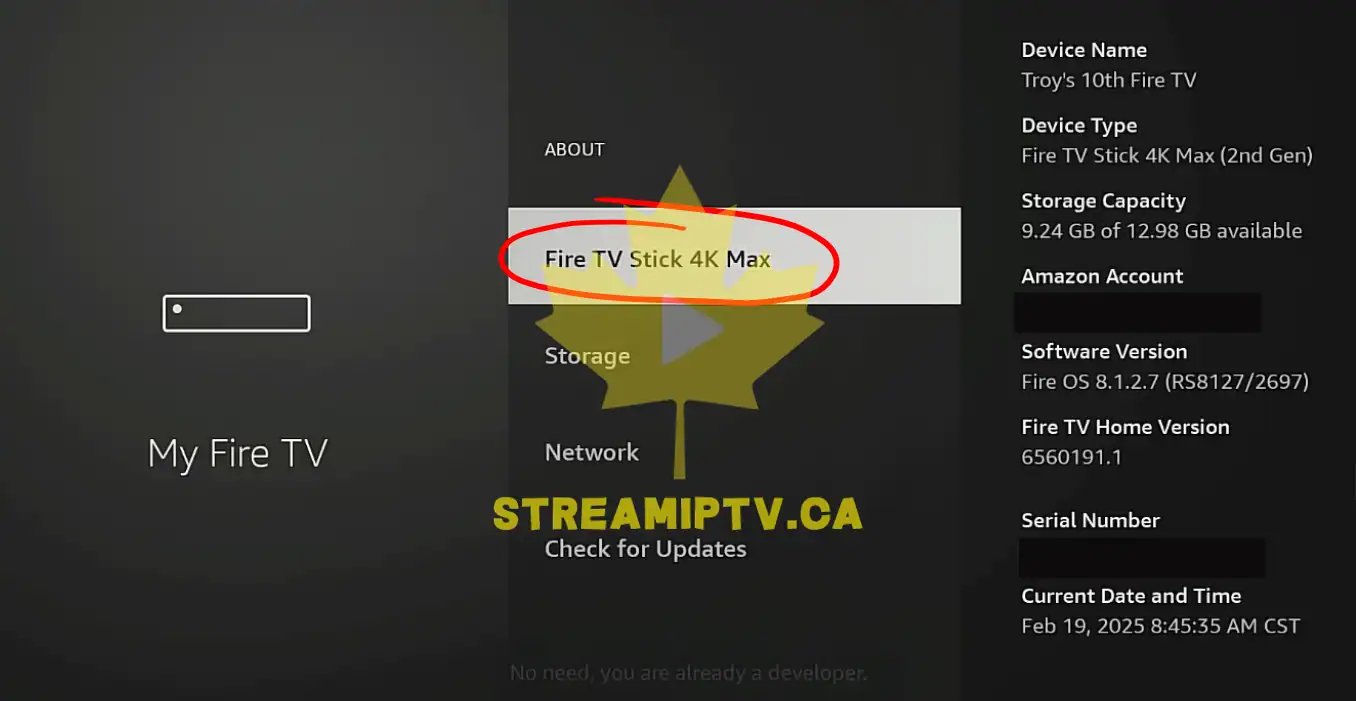
Step 29: Press the center button repeatedly
Press the center button on the device name several times in a row.
Keep pressing steadily. Do not move away from the device name row.
Step 30: Watch for the countdown message
Look for a small message that says you are a certain number of steps away from being a developer.
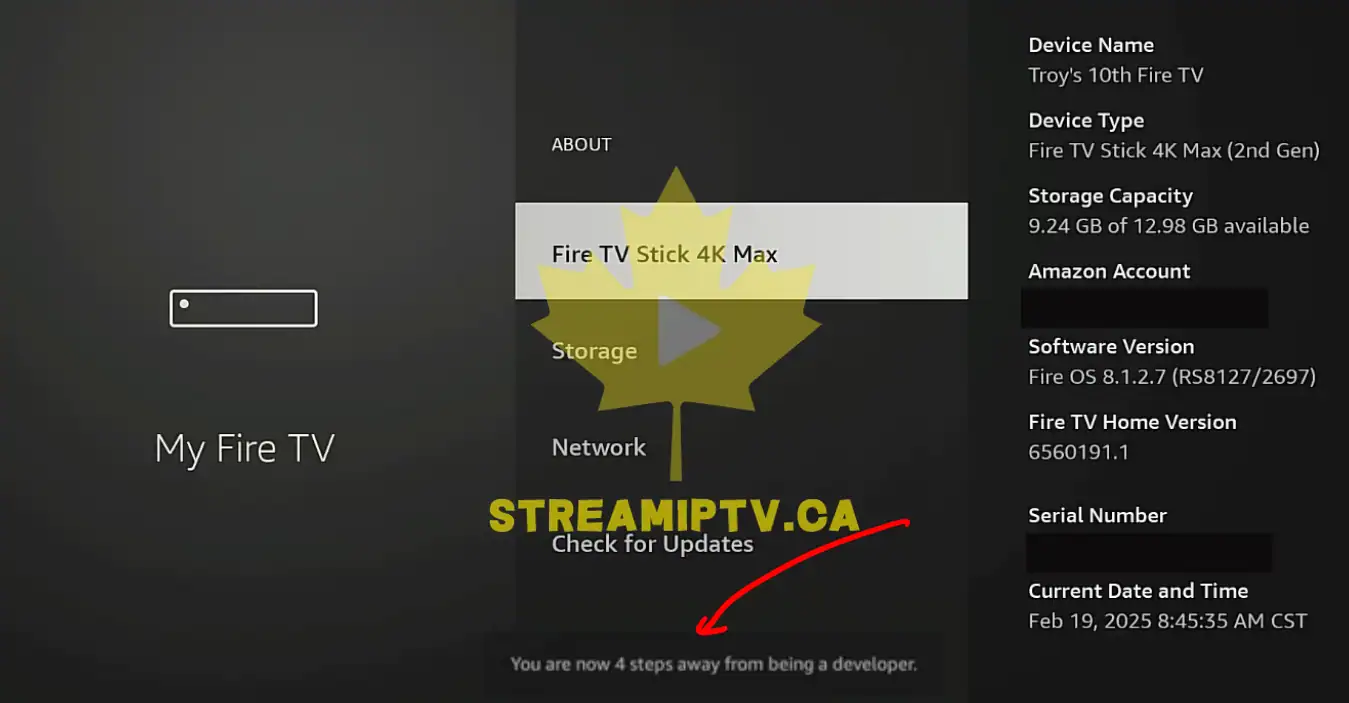
This confirms you are pressing the correct item.
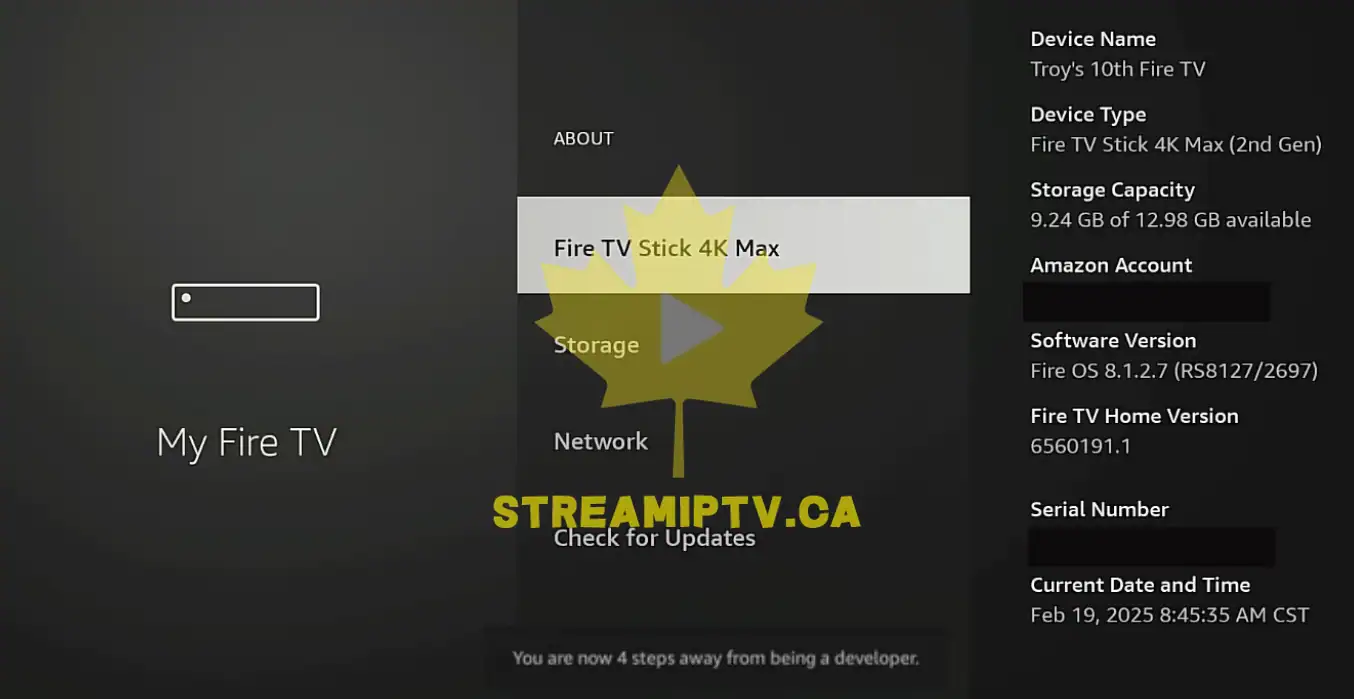
Step 31: Continue pressing until the unlock completes
Keep pressing until the message changes and confirms developer mode is enabled or that you are already a developer.
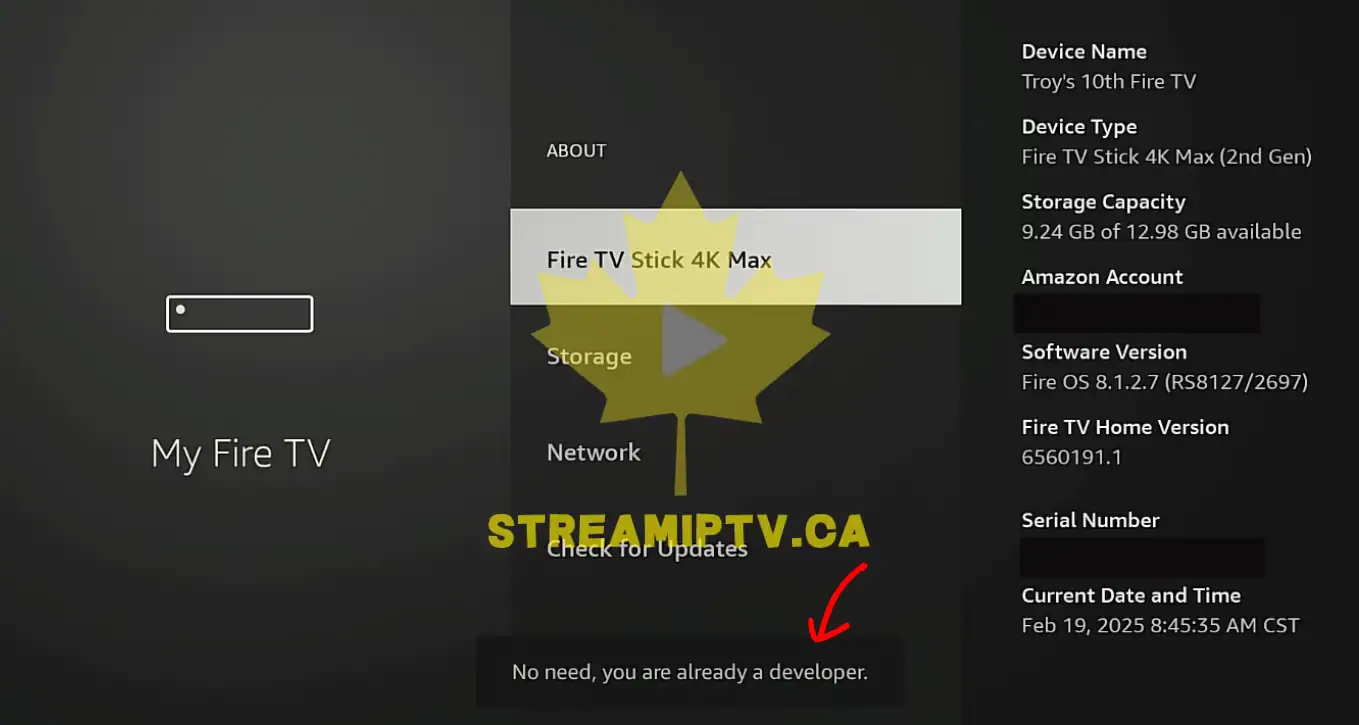
At this point, Developer Options should become available.
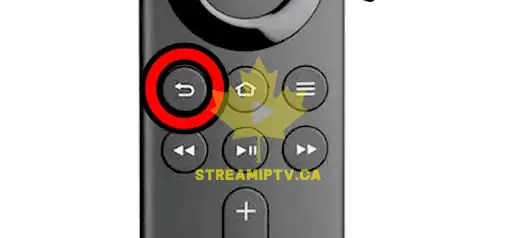
Step 32: Press Back once
Use the Back button to return to the previous My Fire TV screen.
You should now see Developer Options in the list.
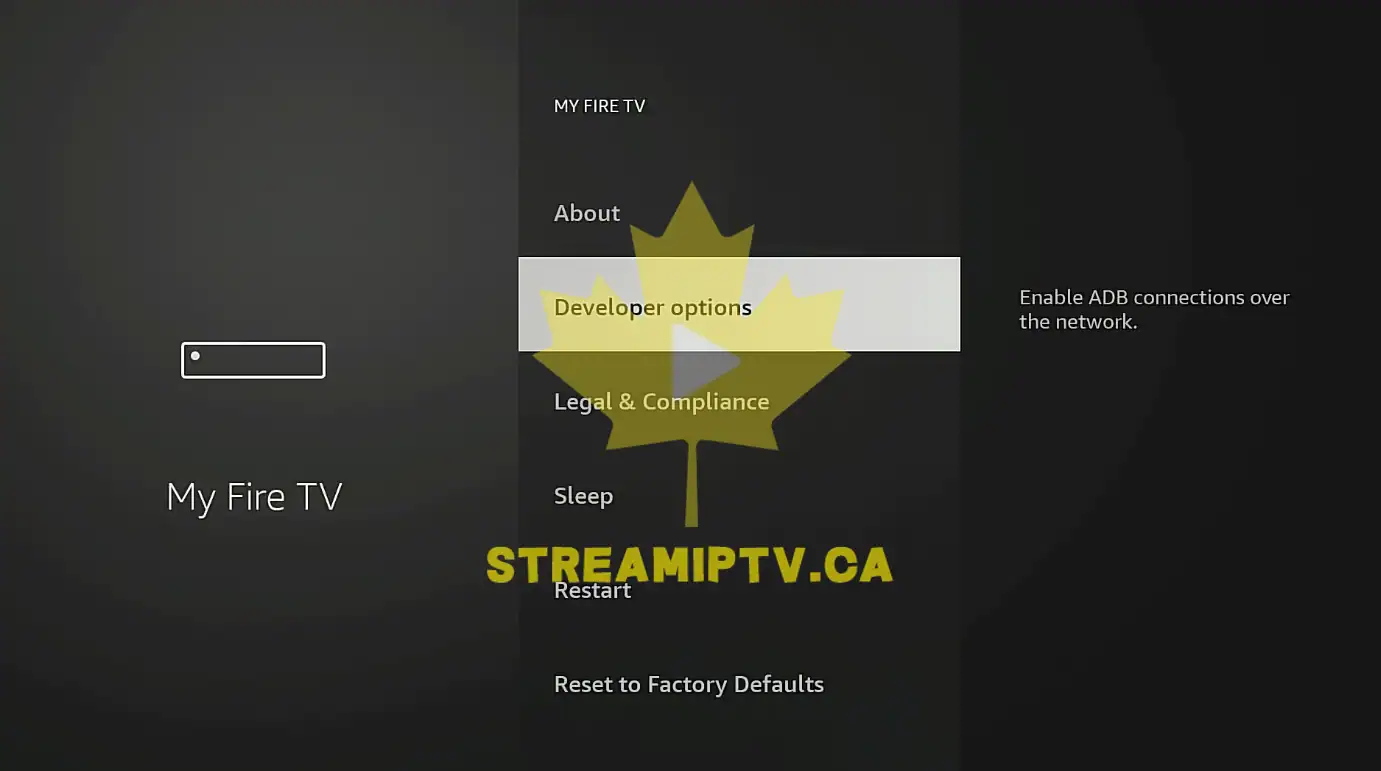
Step 33: Open Developer Options
Select Developer Options and press the center button.

You are now inside the menu that controls app installation permissions.
Step 34: Check the available permission items
Look for options such as Apps from Unknown Sources or Install Unknown Apps.
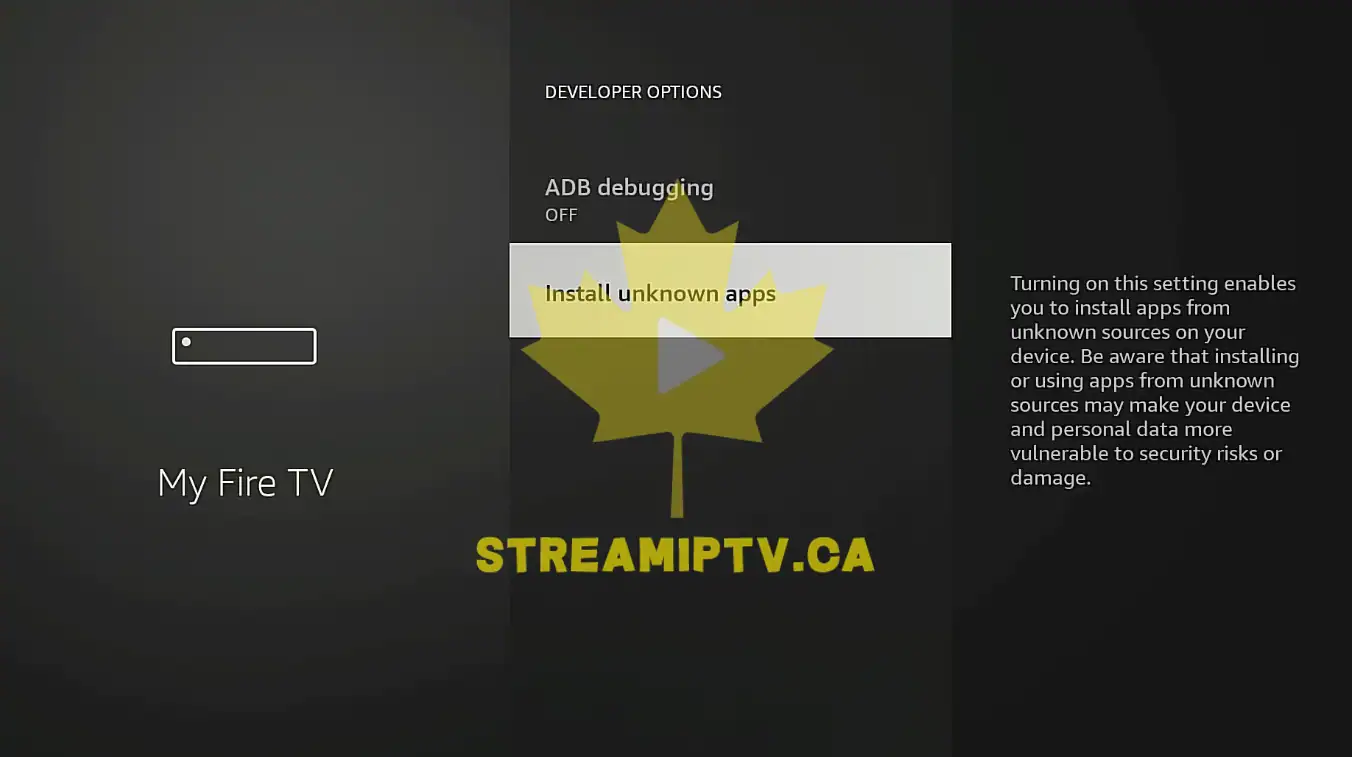
The exact label depends on the Fire OS version.
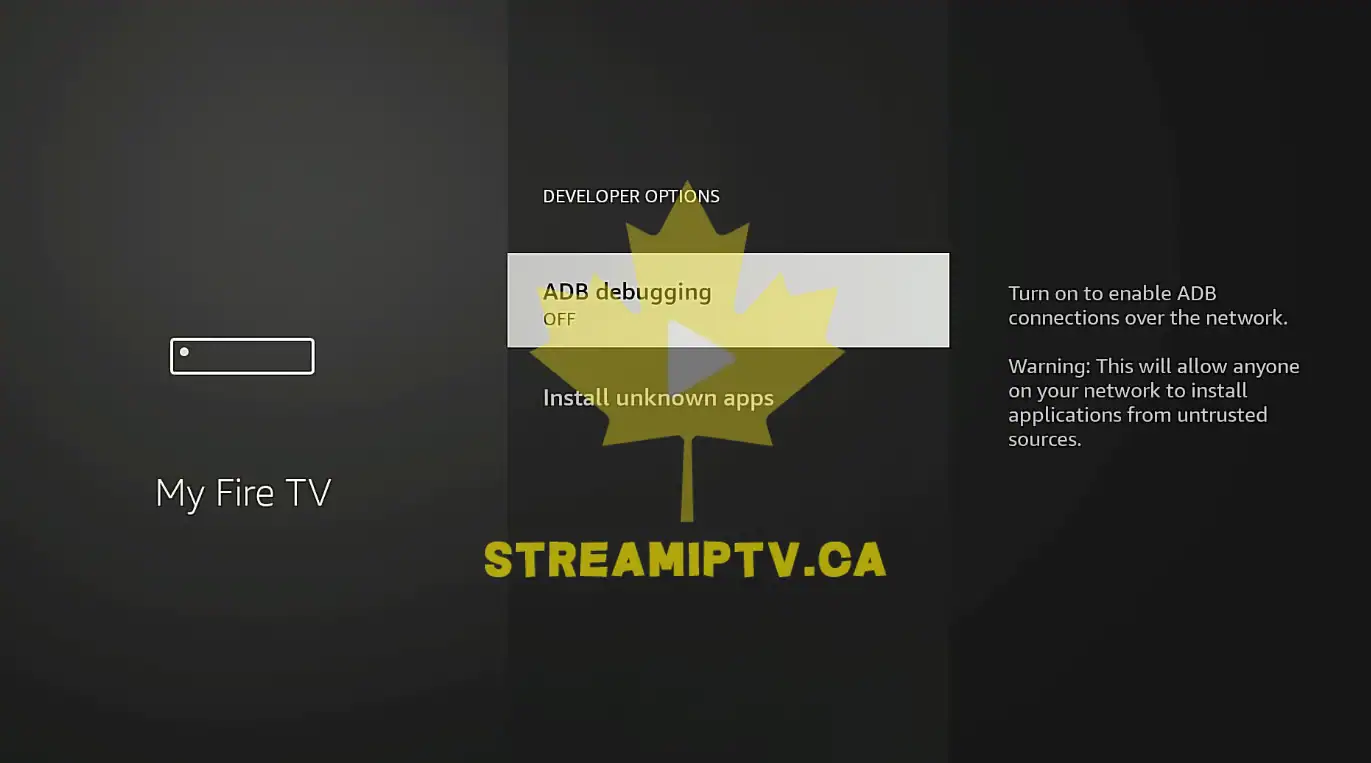
Step 35: Open Install Unknown Apps if present
If you see Install Unknown Apps, select it.
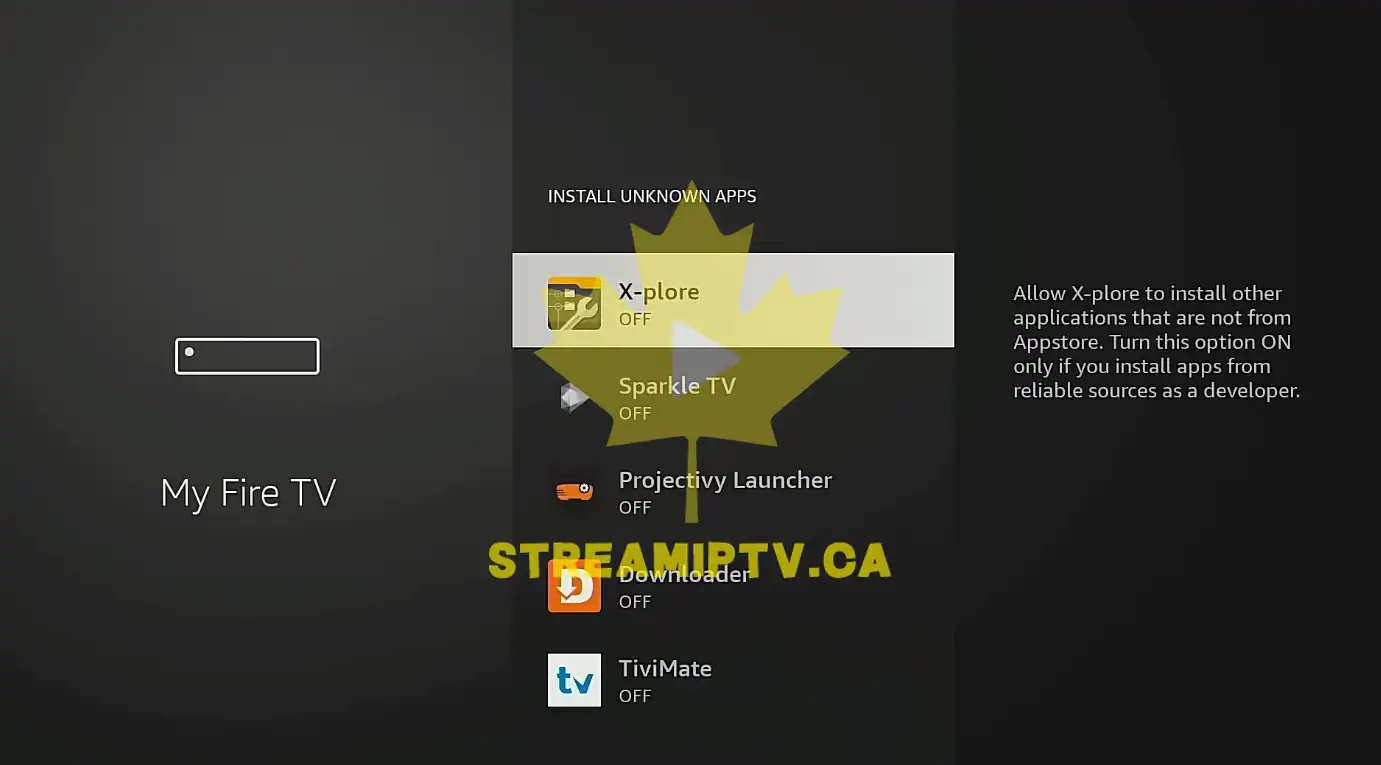
This opens a list of apps that can be granted permission individually.
Step 36: Find Downloader in the list
Scroll through the app list until you locate Downloader.
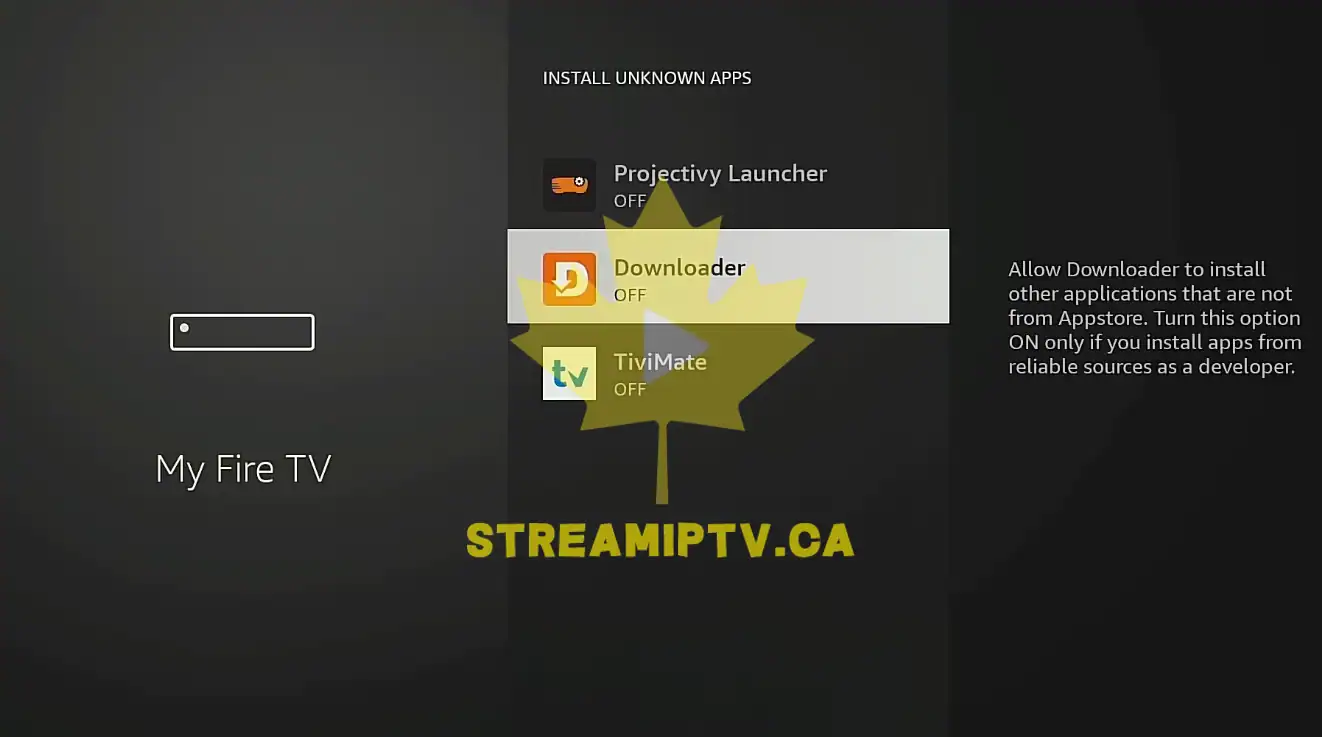
This is the permission entry you need to change.
Step 37: Select Downloader
Highlight Downloader and press the center button.

The status should change from Off to On.
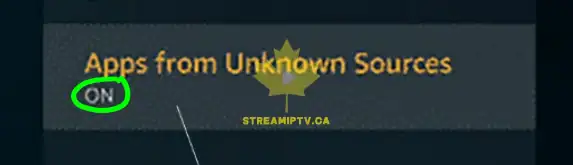
Step 38: Confirm the permission status
Look carefully to make sure Downloader now shows On.
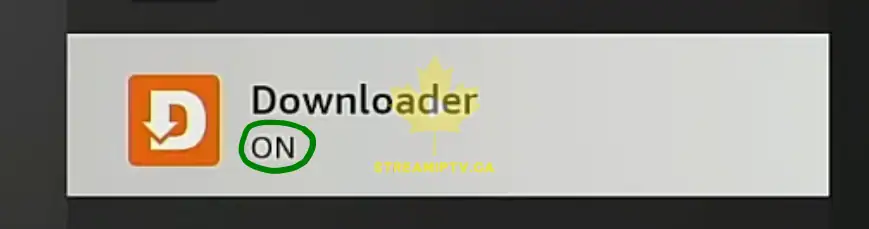
This means Downloader is now allowed to install approved external APK files later if needed.
Step 39: Use the alternate permission method if shown
If your menu does not have Install Unknown Apps and instead shows Apps from Unknown Sources, select that option.
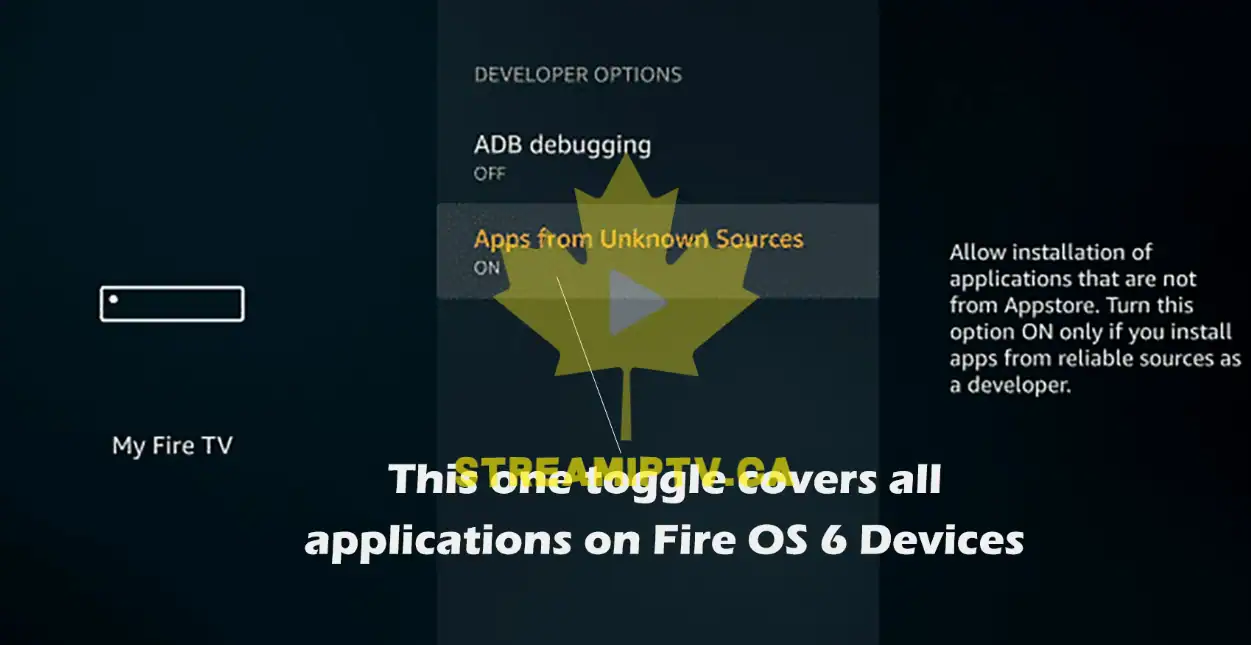
Older Fire OS layouts use a more global permission switch.
Step 40: Turn the permission on
Press the center button to switch the unknown sources option to enabled.
You may see a warning prompt before the change is applied.
Step 41: Accept the warning if prompted
If a confirmation box appears, choose the option that approves the change.
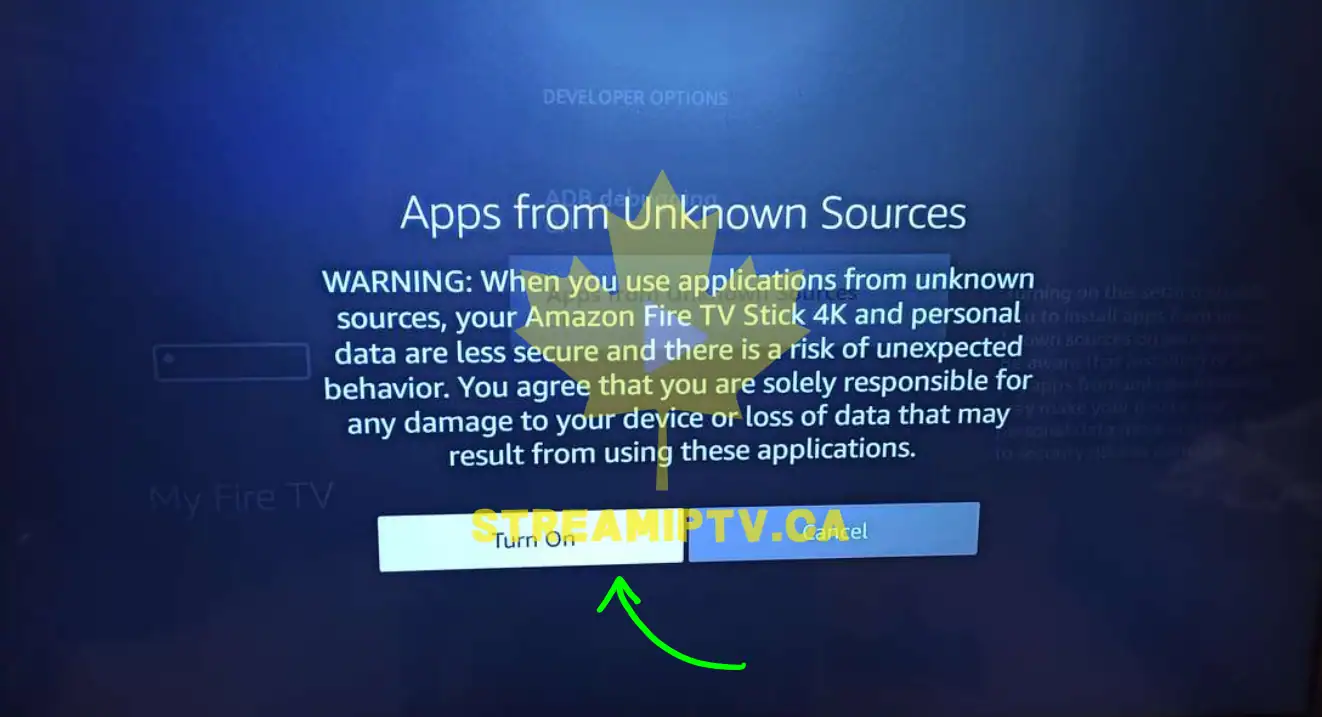
After approval, the permission should be active.
Step 42: Press the Home button again
Return to the Fire TV home screen.

You have now finished the security configuration portion.
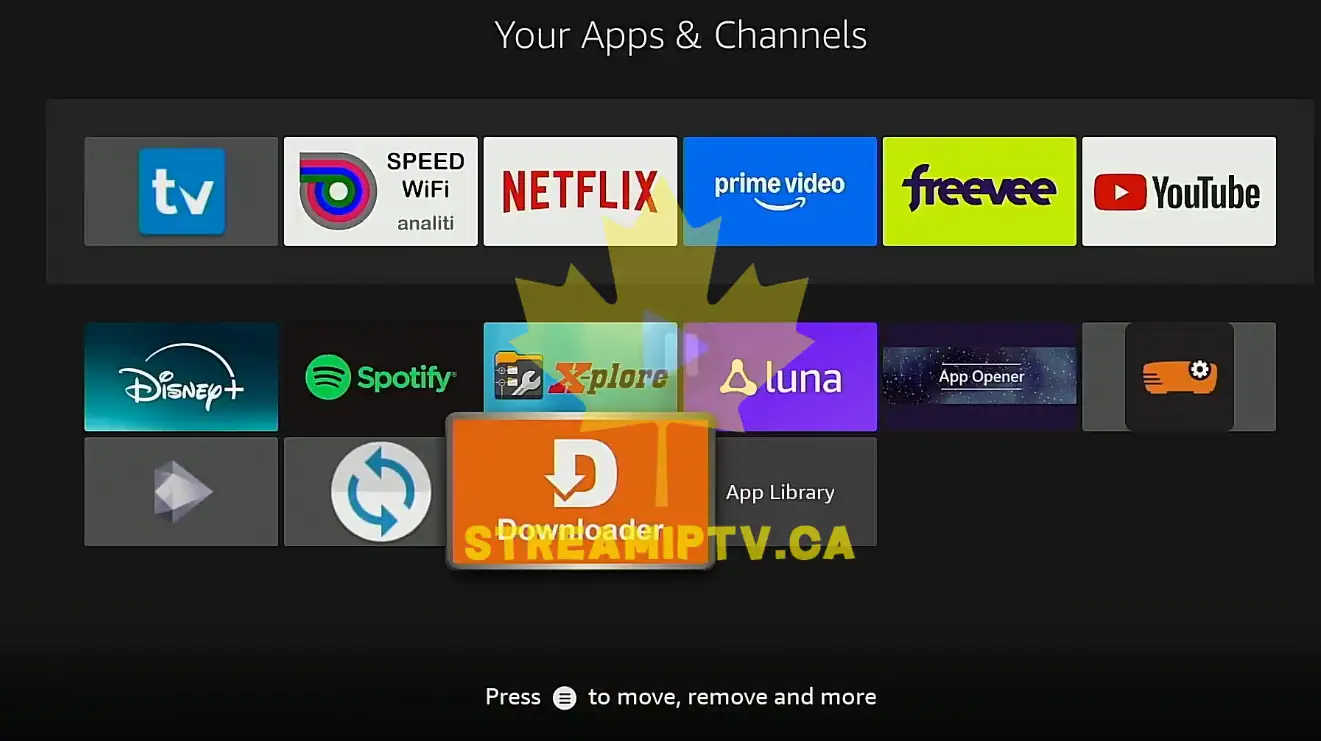
Step 43: Open your Apps library
Go to your apps area to locate Downloader.
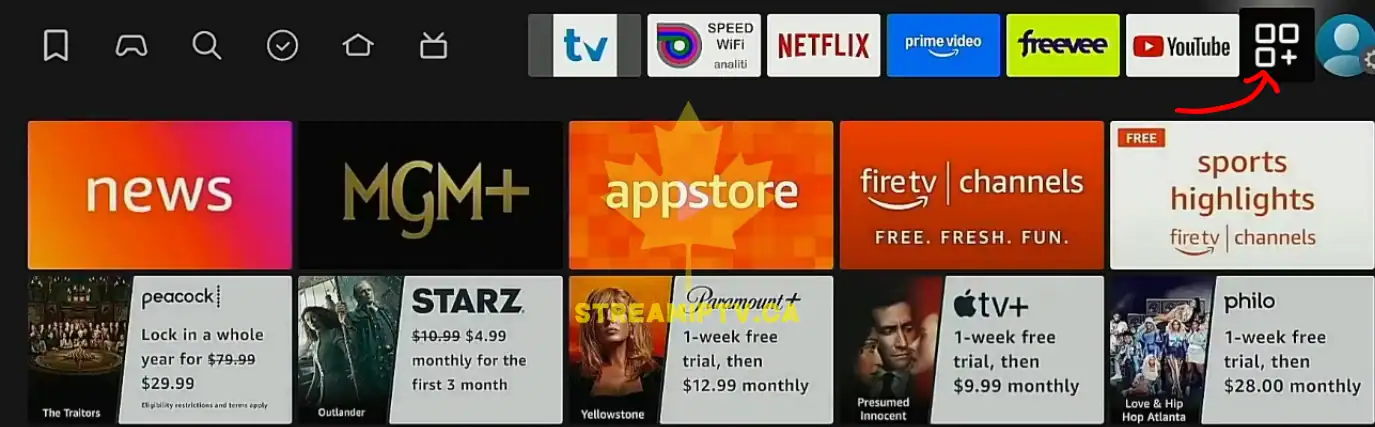
Depending on your layout, this may appear under Your Apps & Channels.
Step 44: Highlight Downloader
Move the selection to the Downloader app icon.
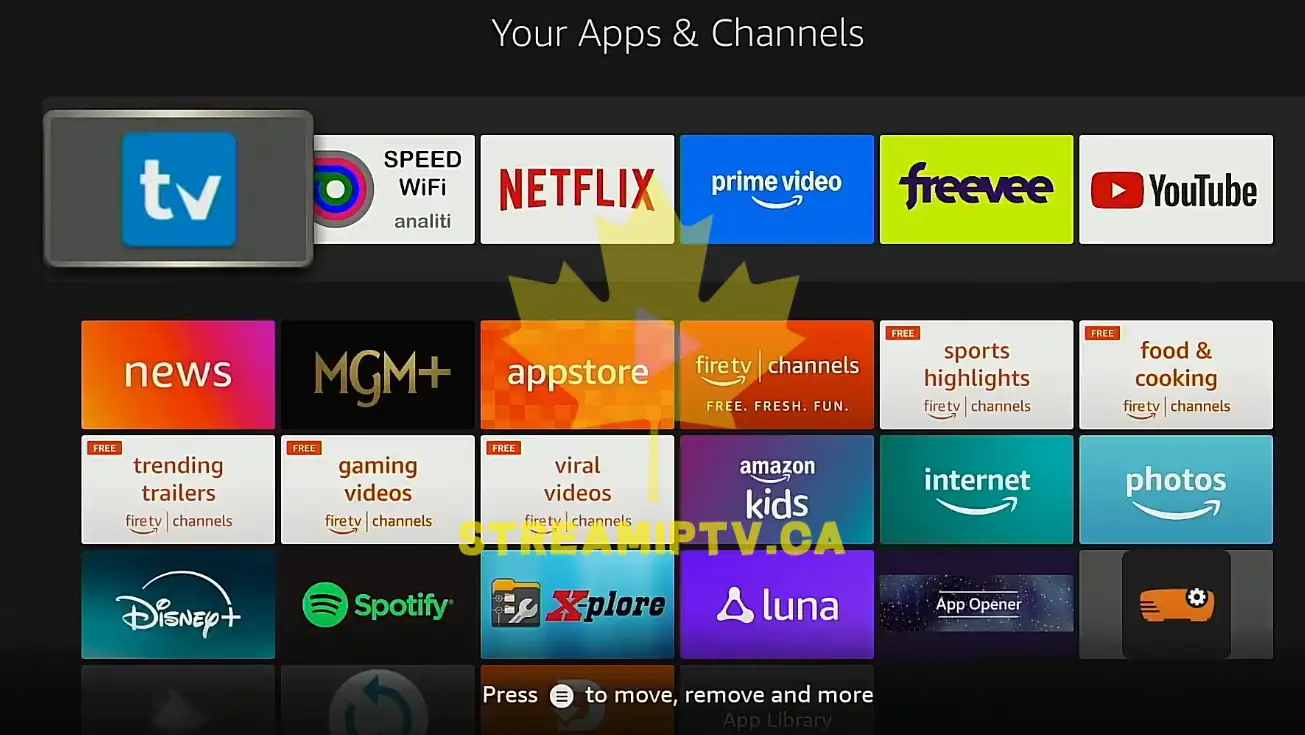
You should now clearly see the installed app in your library.
Step 45: Open Downloader
Press the center button to launch the app.
The first launch may take a few seconds longer than normal.
Step 46: Review the first-run prompts
Look for any welcome screen, quick tips, or permission request.
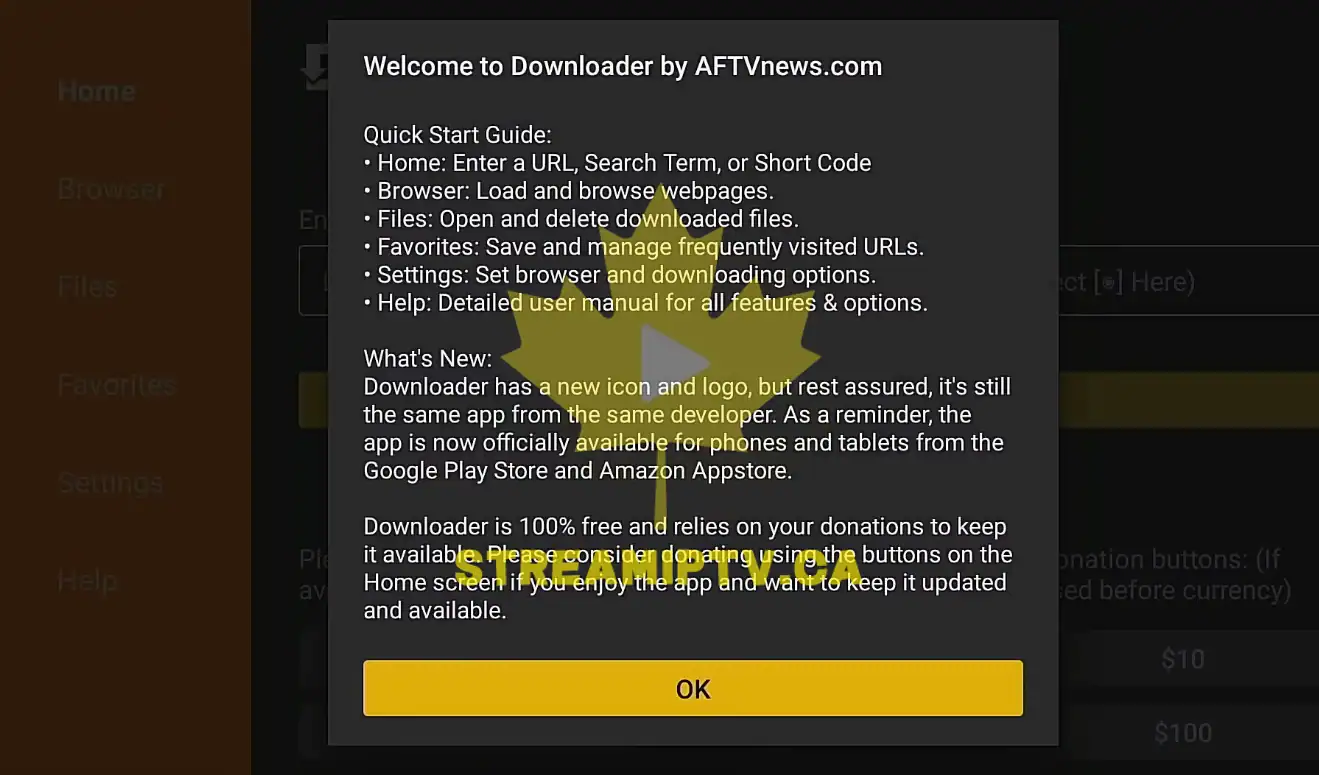
Downloader often shows a first-use introduction on initial launch.
Step 47: Accept basic permissions if requested
If Downloader asks for access needed to download files, approve the request so the app can function properly.
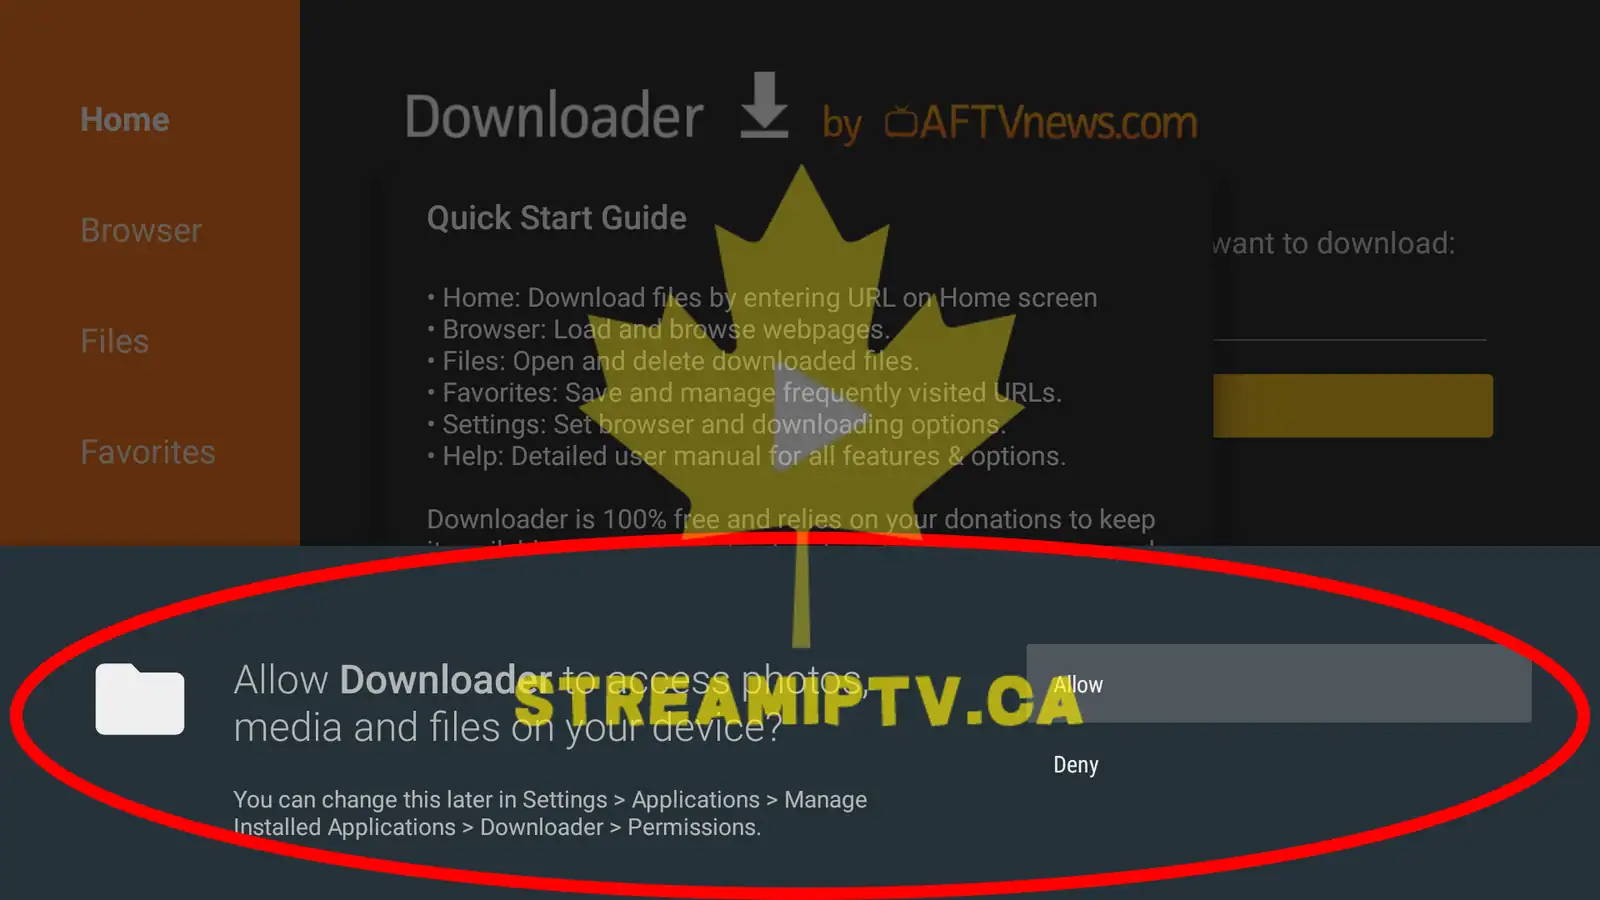
Without this permission, file downloads may fail later.
Step 48: Wait for the main Downloader screen
Do not press extra buttons until the main screen loads completely.
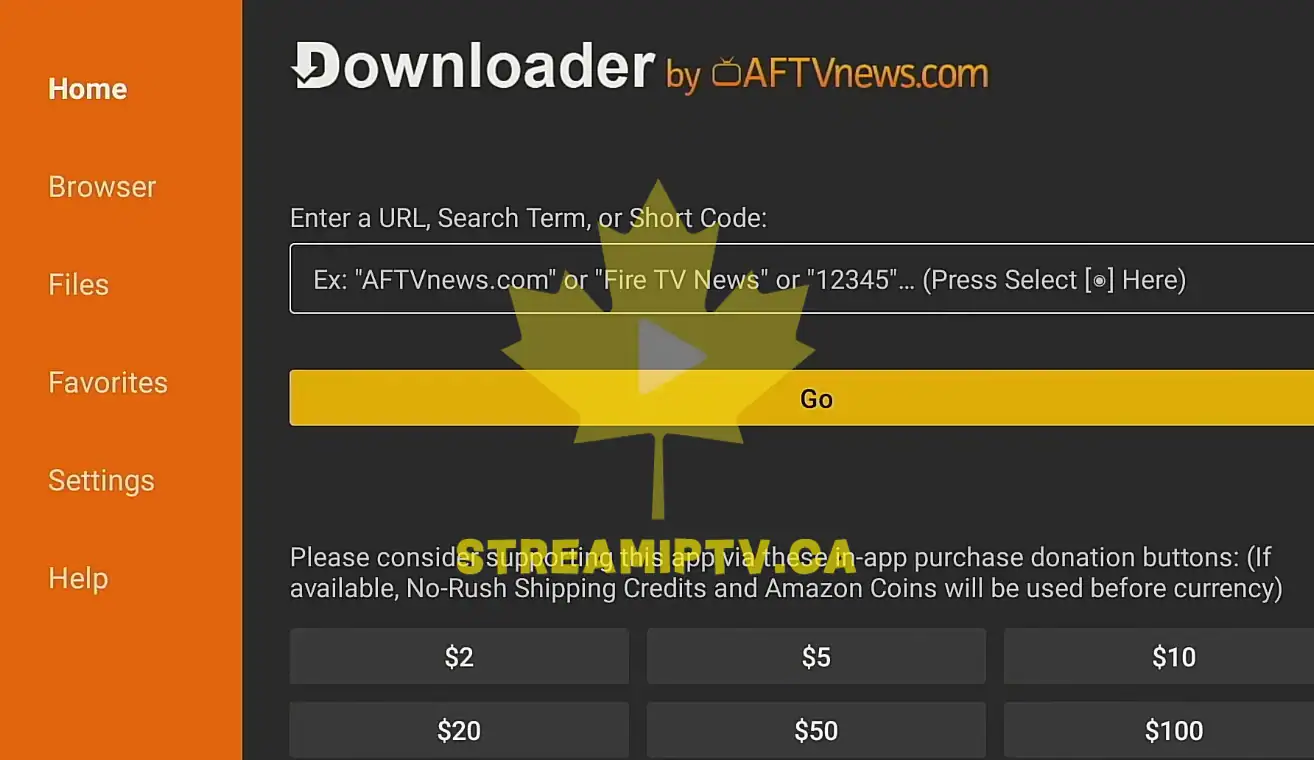
You should see the standard Downloader interface with a URL field or navigation panel.
Step 49: Confirm the app is working
Check that the home screen responds normally and that no error message appears.
If the app opens correctly, the installation was successful.
Step 50: Close or leave Downloader ready for later use
You can now exit the app or keep it ready for the next setup task that requires downloading an external file.
The full setup is complete , now you can download the apps to enjoy the best iptv in canada .
Common Problems
Problem: Downloader does not appear in search results.
This usually happens when the search term was typed incorrectly or the Appstore did not load properly. Go back to the search screen and type Downloader again slowly. Confirm that the publisher is AFTVnews. If results still do not appear, restart the Fire TV and try again.
Problem: The install button does not respond.
If the button seems stuck, the device may have a network issue. Test the internet connection inside Fire TV settings. If your Wi-Fi signal is weak, move the router closer, reduce interference, or temporarily disconnect other heavy devices from the network.
Problem: Developer Options is missing.
This is very common on newer Fire TV models. Go to Settings > My Fire TV > About, highlight the device name, and press the center button repeatedly until the developer message appears. Then go back and open Developer Options.
Problem: Downloader is installed but cannot install external apps later.
This usually means the unknown apps permission was not enabled for Downloader. Return to Settings > My Fire TV > Developer Options and verify that Downloader is set to On.
Problem: Downloader opens but shows a permission error.
Close the app and open it again. When the permission prompt appears, allow the required access. If you already denied the request, you may need to check app permissions in Fire TV settings.
Problem: The Fire TV feels slow during setup.
Older Fire TV Stick models can lag when storage is full or many background apps are open. Restart the device, remove unused apps if necessary, and try again.
Problem: The Appstore loads slowly in Canada during peak evening hours.
This is often related to network congestion or router placement rather than the Fire TV itself. Homes with Bell, Rogers, Vidéotron, Telus, Cogeco, or Shaw service can all experience local Wi-Fi slowdowns if many devices are streaming at once.
Optimization Tips
- Use 5 GHz Wi-Fi if available. It is usually faster and more stable at short range than 2.4 GHz.
- Keep the Fire TV within good router range. Weak signal leads to slow downloads and delayed menu loading.
- Restart the Fire TV after major changes. This can help settings apply cleanly.
- Keep enough free storage. Low storage can cause installation failures or sluggish menus.
- Install only what you need. Too many unused apps can reduce available space and make the interface slower.
- Avoid heavy downloads on the same network during setup. Large downloads on computers or phones can slow Fire TV app installation.
- Use a reliable power source. A weak USB power connection can sometimes make Fire TV performance unstable. The official power adapter is preferable.
Once Downloader is installed and the unknown app permission is enabled, your Fire TV is prepared for the next stage of any setup that requires downloading an external APK file. That foundation step is often where beginners get blocked, so doing it carefully now saves time later.
FAQ
1. Is Downloader by AFTVnews the correct app to install?
Yes. On Fire TV, the trusted Downloader app is normally listed as Downloader by AFTVnews. Always verify the publisher before installing.
2. Why do I need Developer Options for Downloader?
You do not need Developer Options just to install Downloader from the Amazon Appstore. You need it when you want Downloader to install external APK files later.
3. What if I do not see Developer Options on my Fire TV Stick?
Open Settings > My Fire TV > About, highlight your device name, and press the center button several times until the developer message appears.
4. Is it normal to see Get on one device and Download on another?
Yes. Amazon can show different button labels depending on whether the app was installed before, tied to your account history, or displayed under a slightly different Fire OS layout.
5. Can I turn off unknown apps permission later?
Yes. You can always go back into Developer Options and disable Downloader’s installation permission when you no longer need it.
6. Does installing Downloader damage the Fire TV?
No. Downloader itself is a common utility app for Fire TV. The important part is to use it carefully and only download files from sources you trust.
7. Why is the installation taking too long?
Slow installation is usually caused by network speed, temporary Appstore delay, or low device storage. Restarting the device and checking the internet connection often helps.
8. Can these steps work on other Fire TV devices besides Fire TV Stick?
Yes. The same general process works on Fire TV Cube and many other Fire TV models, though the screen layout can vary slightly.


Comments (0)
Leave a comment