
How to Set Up the Connection Link (Host URL, Port, and DNS) for Xtream Codes ?
Slideshow Mode
Follow each step fullscreen. Swipe, drag or use ←→ keys.
Learn how to set up a custom Host URL for Xtream Codes by adding your domain to DNS hosting, configuring nameservers, and waiting for DNS propagation.
In this tutorial, you will learn how to configure a custom Host URL for your Xtream Codes connection using a domain you already own.
We will add the domain to your DNS hosting service, obtain the required nameservers, update them at your domain registrar, and wait for the DNS changes to propagate.
Before you start: Make sure you already own a domain from a registrar such as Namecheap, GoDaddy, or another domain provider.
Important: DNS changes are not always immediate. After completing the configuration, propagation can take from a few minutes up to 24 hours.
Start
Go to My DNS Hosting
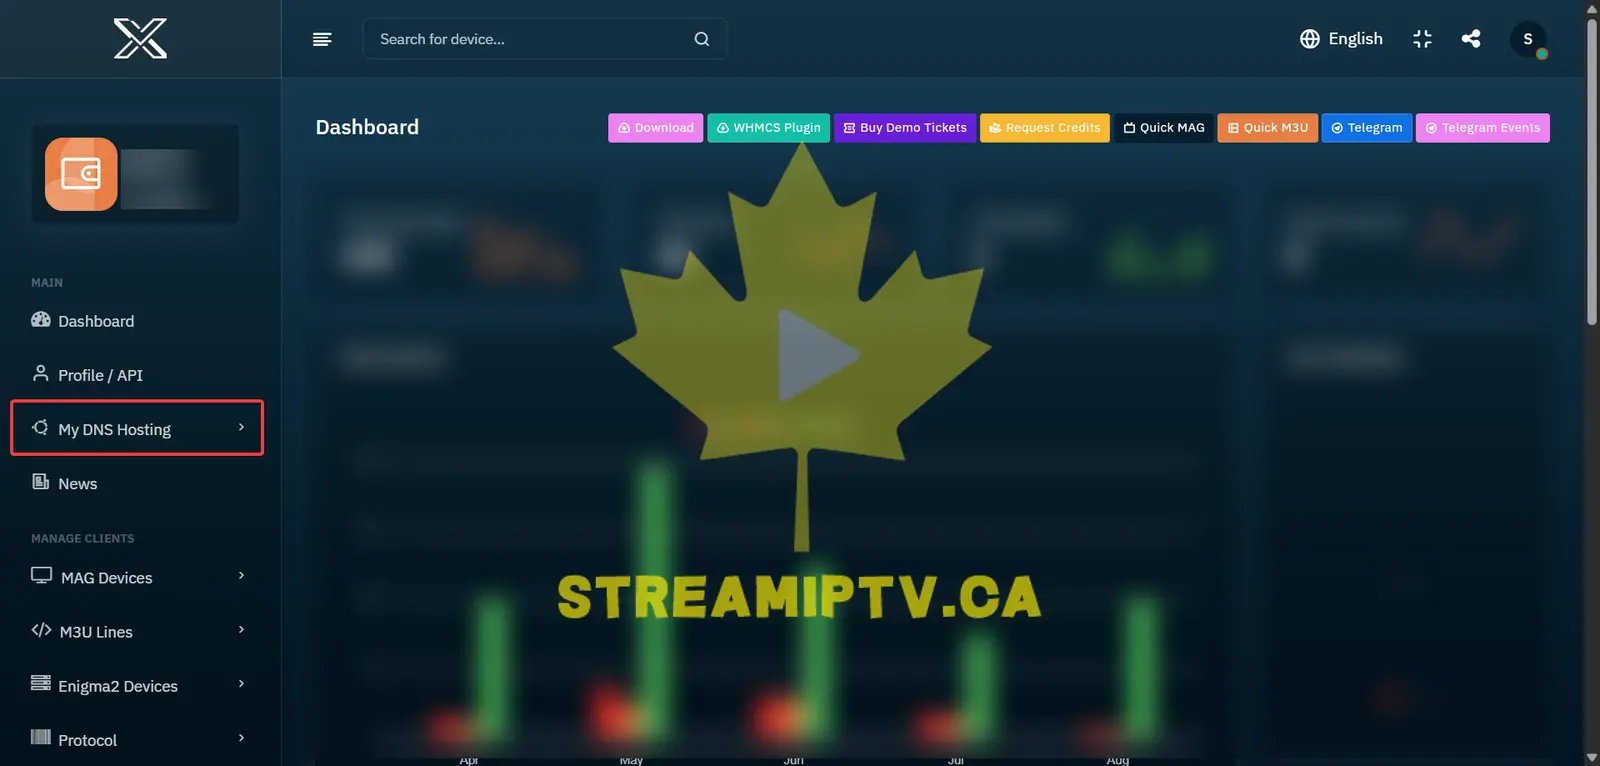
Log in to your panel and open My DNS Hosting to manage the domains used for your server connections.
Go to My Hosts
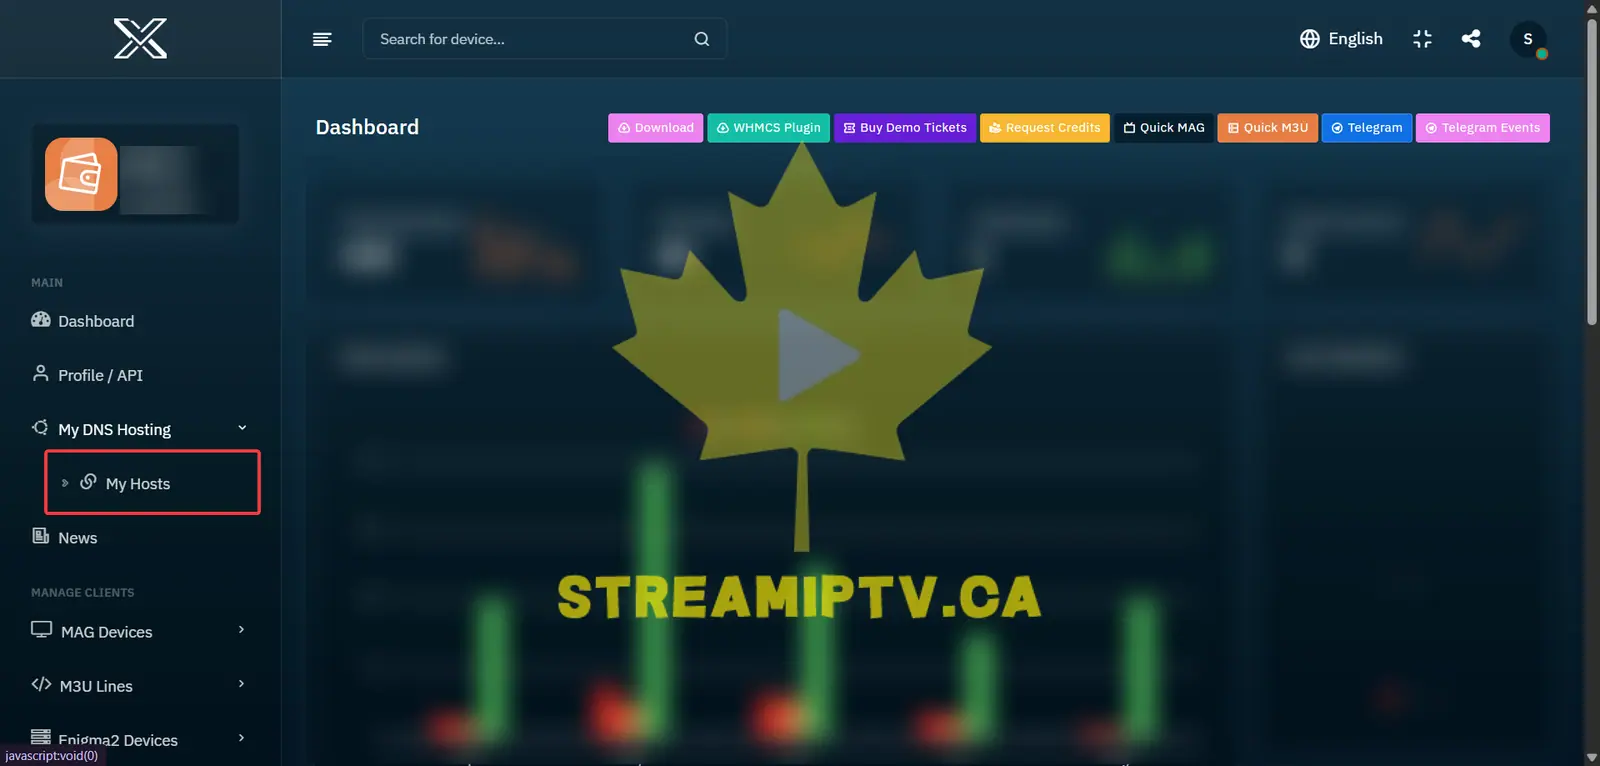
Inside My DNS Hosting, open My Hosts to view and manage your configured domains.
Click Add Host
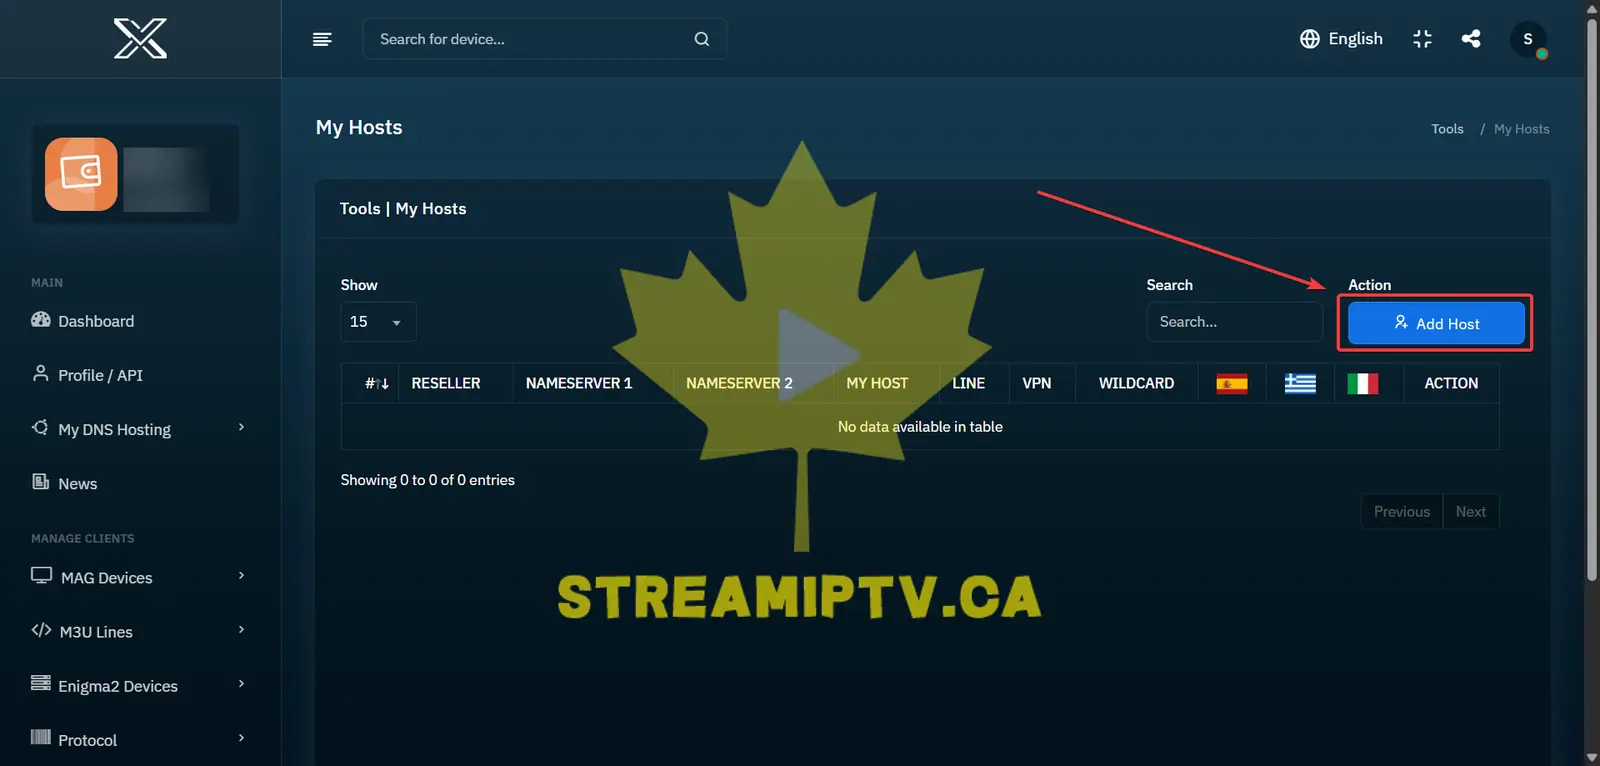
Click Add Host to add a new domain. Make sure you already have access to its DNS or nameserver settings.
Enter Your Domain and Click Add
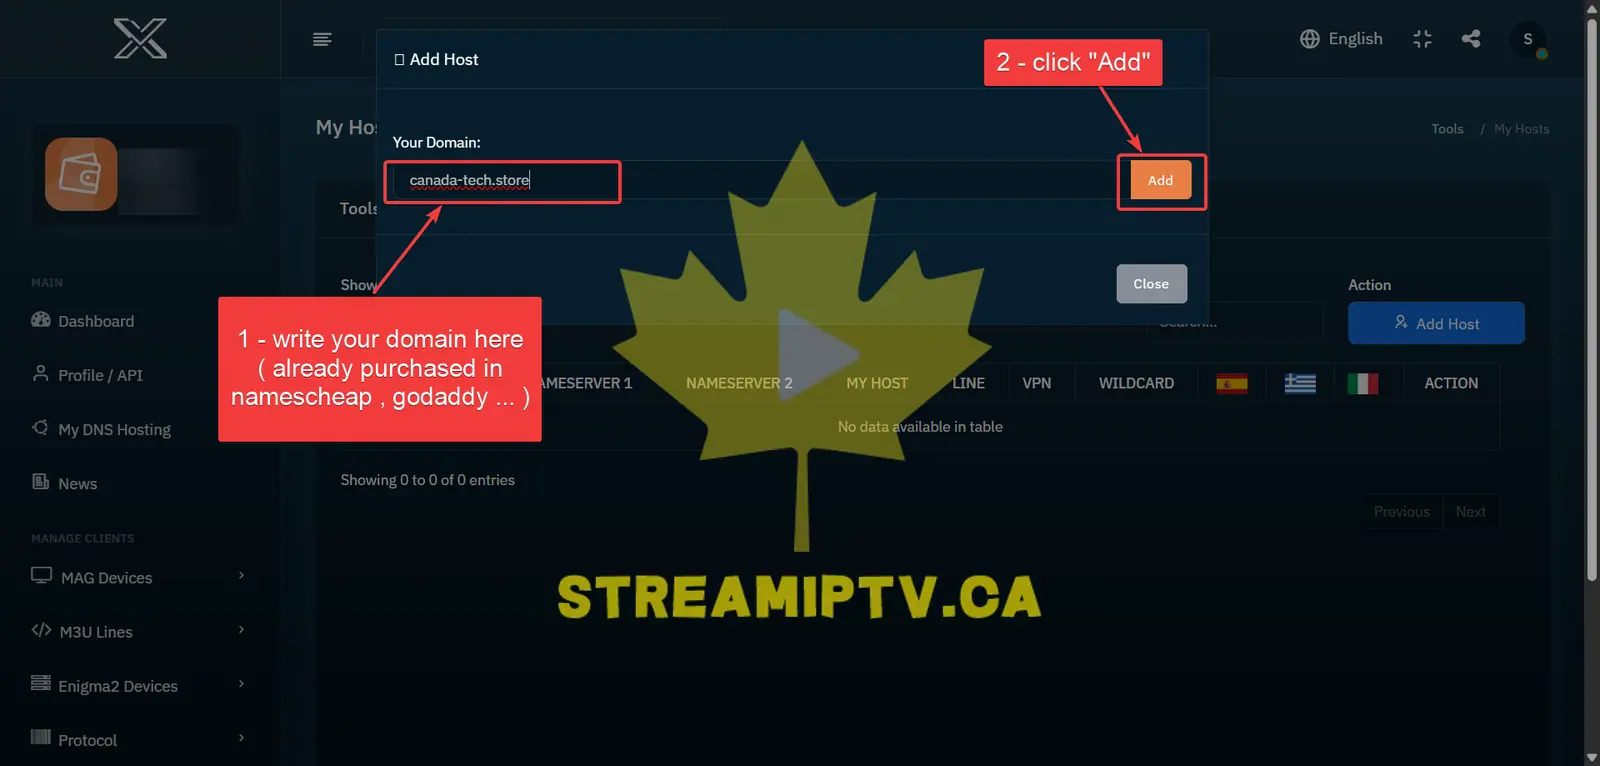
Enter the domain you purchased from Namecheap, GoDaddy, or another registrar, then click Add.
Example: canada-tech.store
Tip: Check the spelling carefully before continuing.
Find the Generated Nameservers
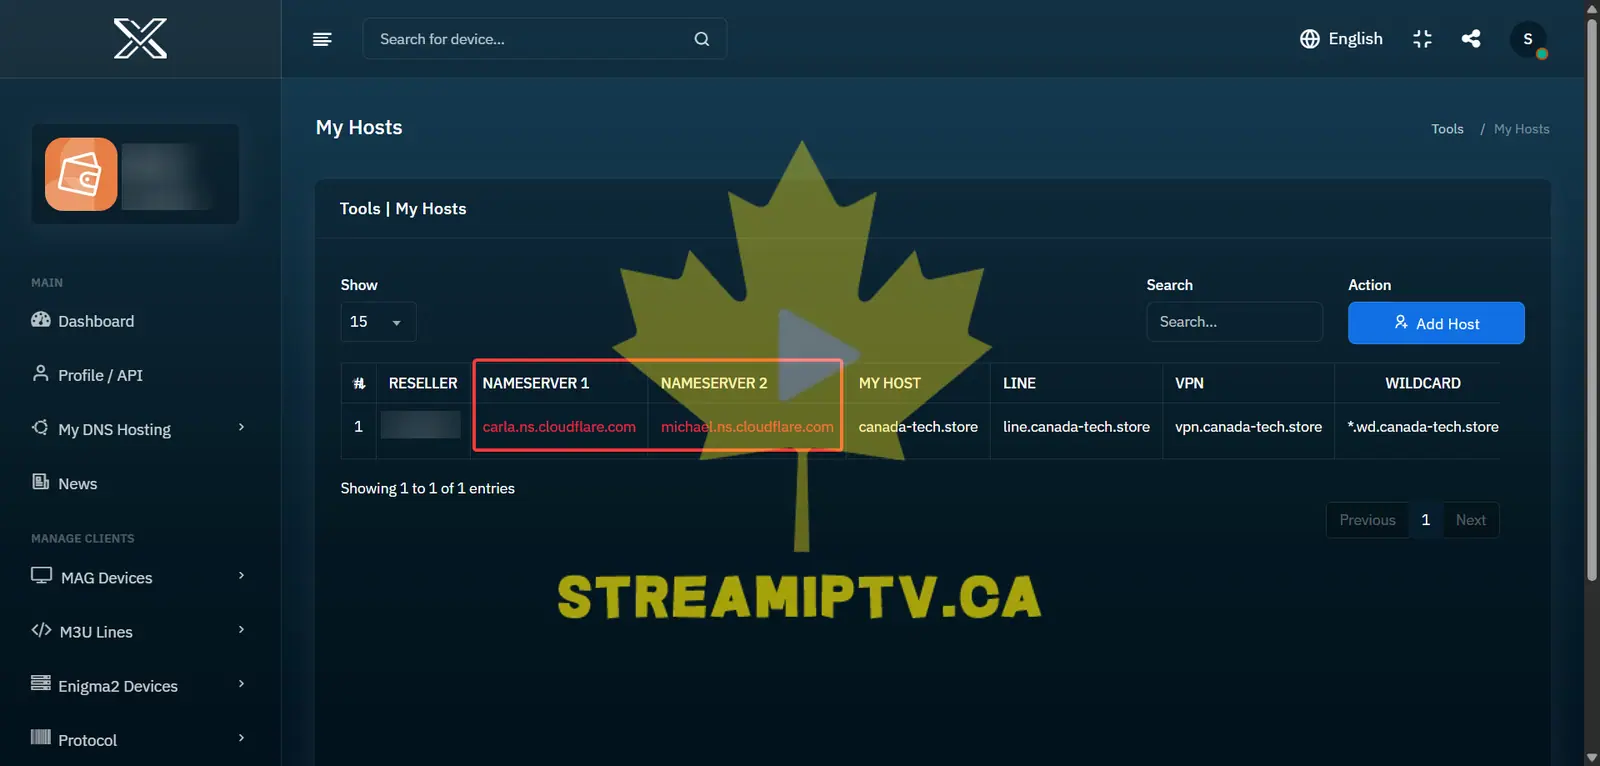
Your DNS hosting service will generate the nameservers required for your domain.
Example:
ns1.example.com
ns2.example.com
Keep this page open and use the exact nameservers generated for your domain.
Go to Your Domain List
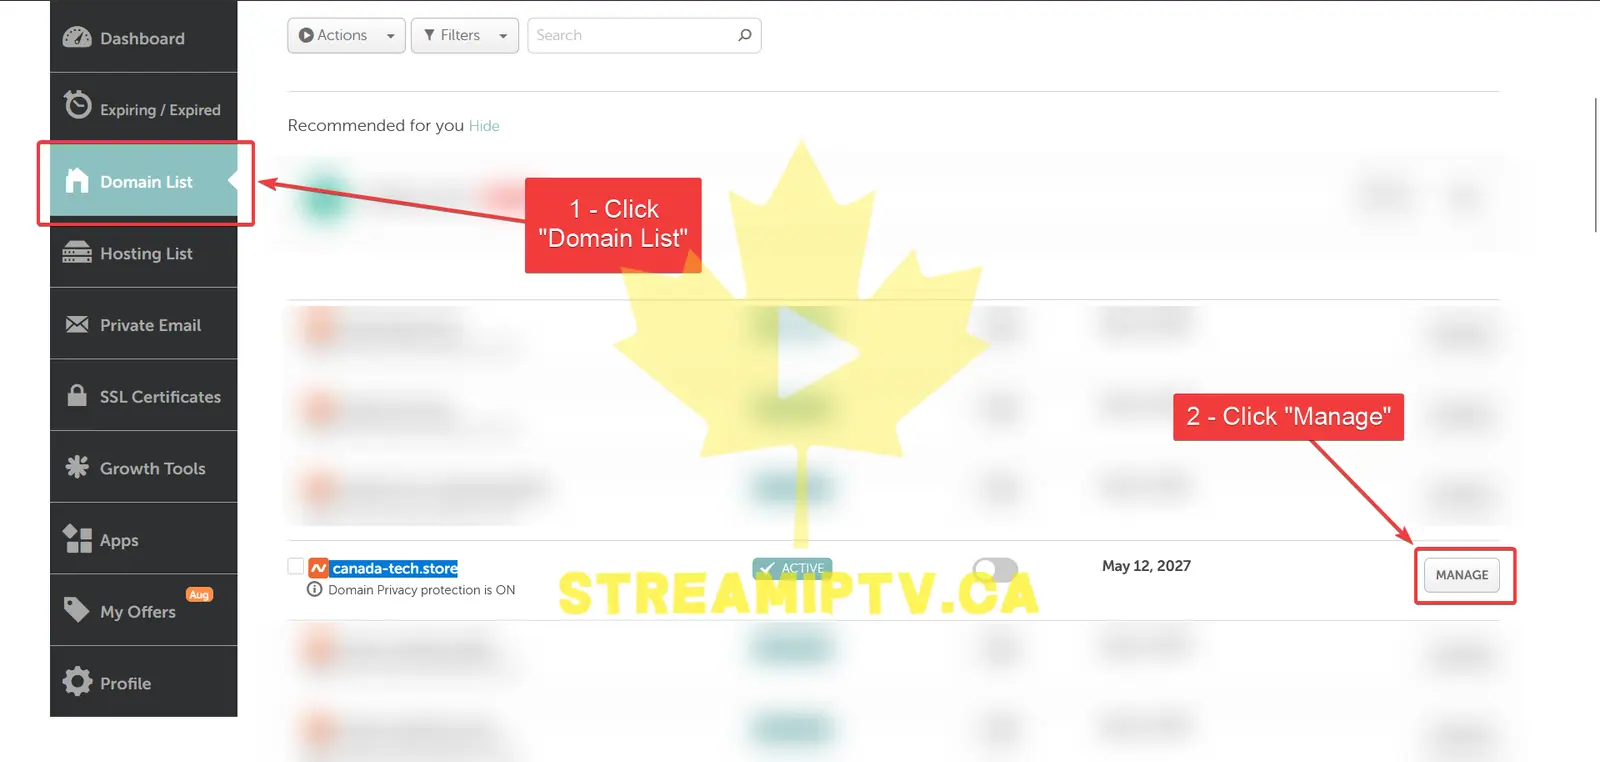
Open your domain provider, go to Domain List, find the same domain, and click Manage.
Make sure you are editing the correct domain.
Select Custom DNS
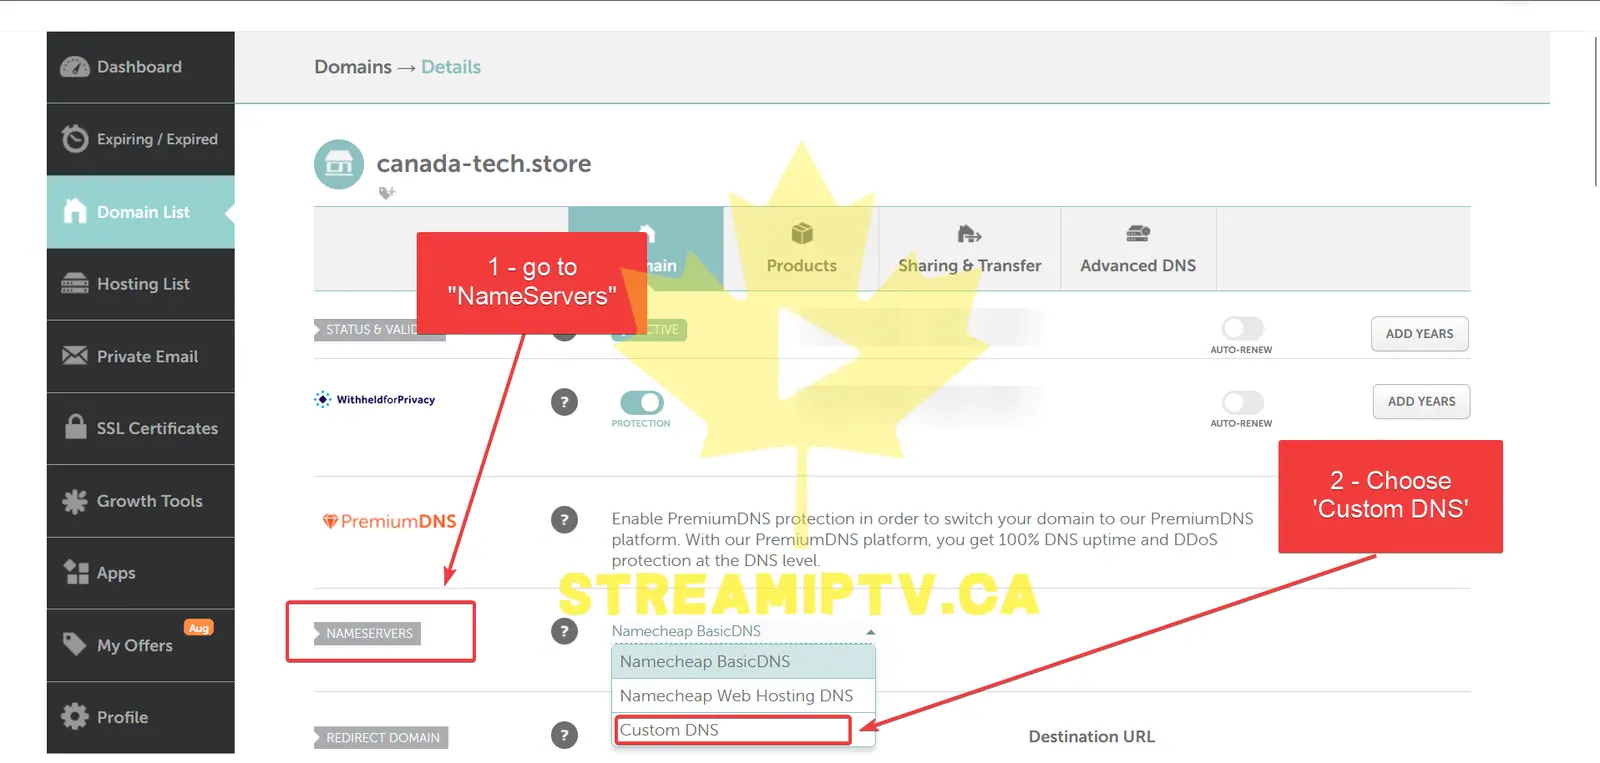
Find Nameservers and change the setting from the default option to Custom DNS.
This allows the domain to use the nameservers generated by your DNS hosting service.
Paste the Custom Nameservers
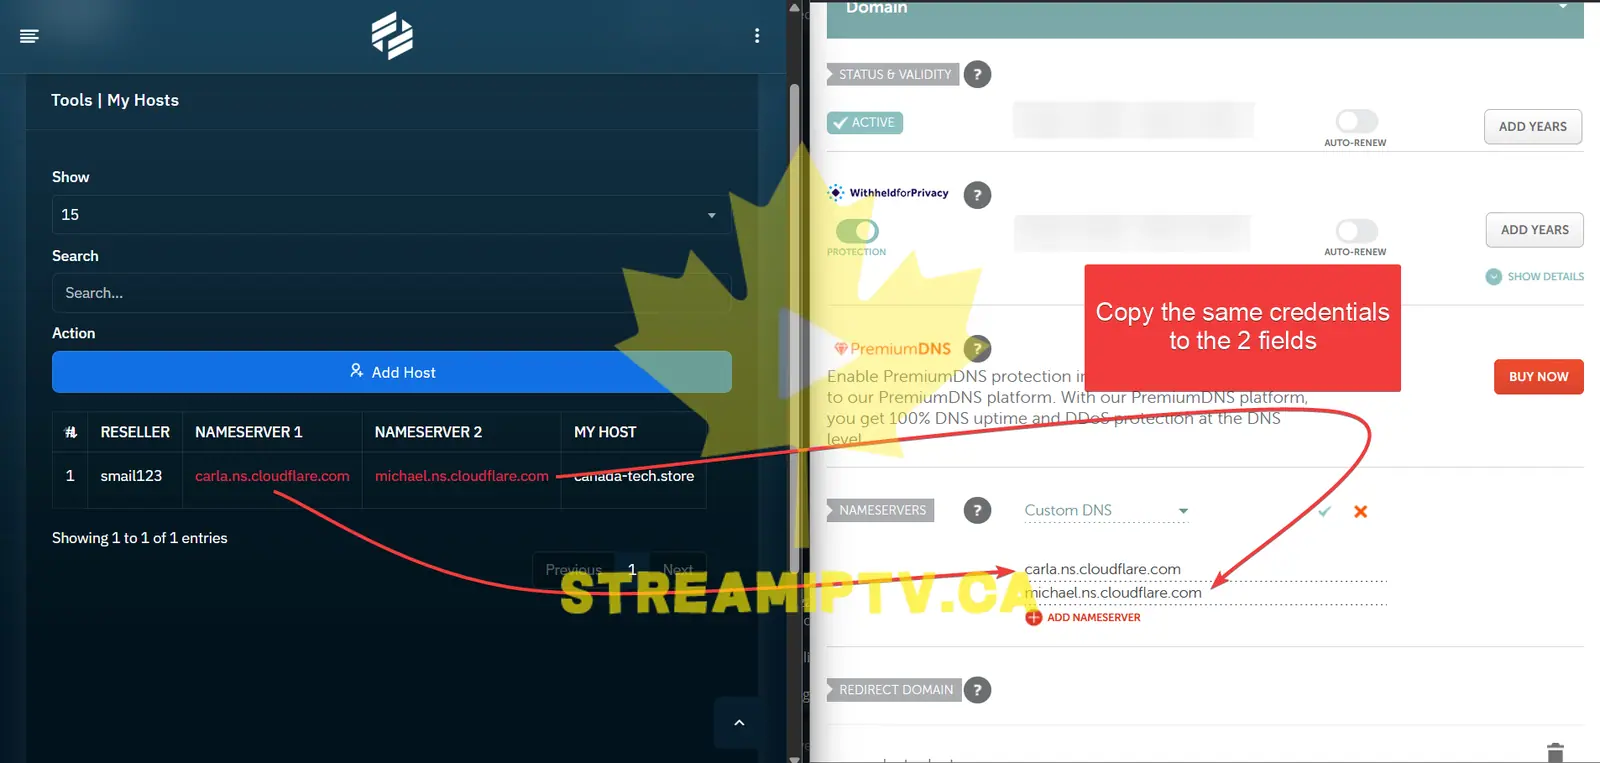
Copy the generated nameservers and paste them into the Custom DNS fields.
- Nameserver 1: First generated nameserver
- Nameserver 2: Second generated nameserver
Copy them exactly as provided. A spelling mistake can prevent your domain from resolving correctly.
Save Your Nameserver Settings
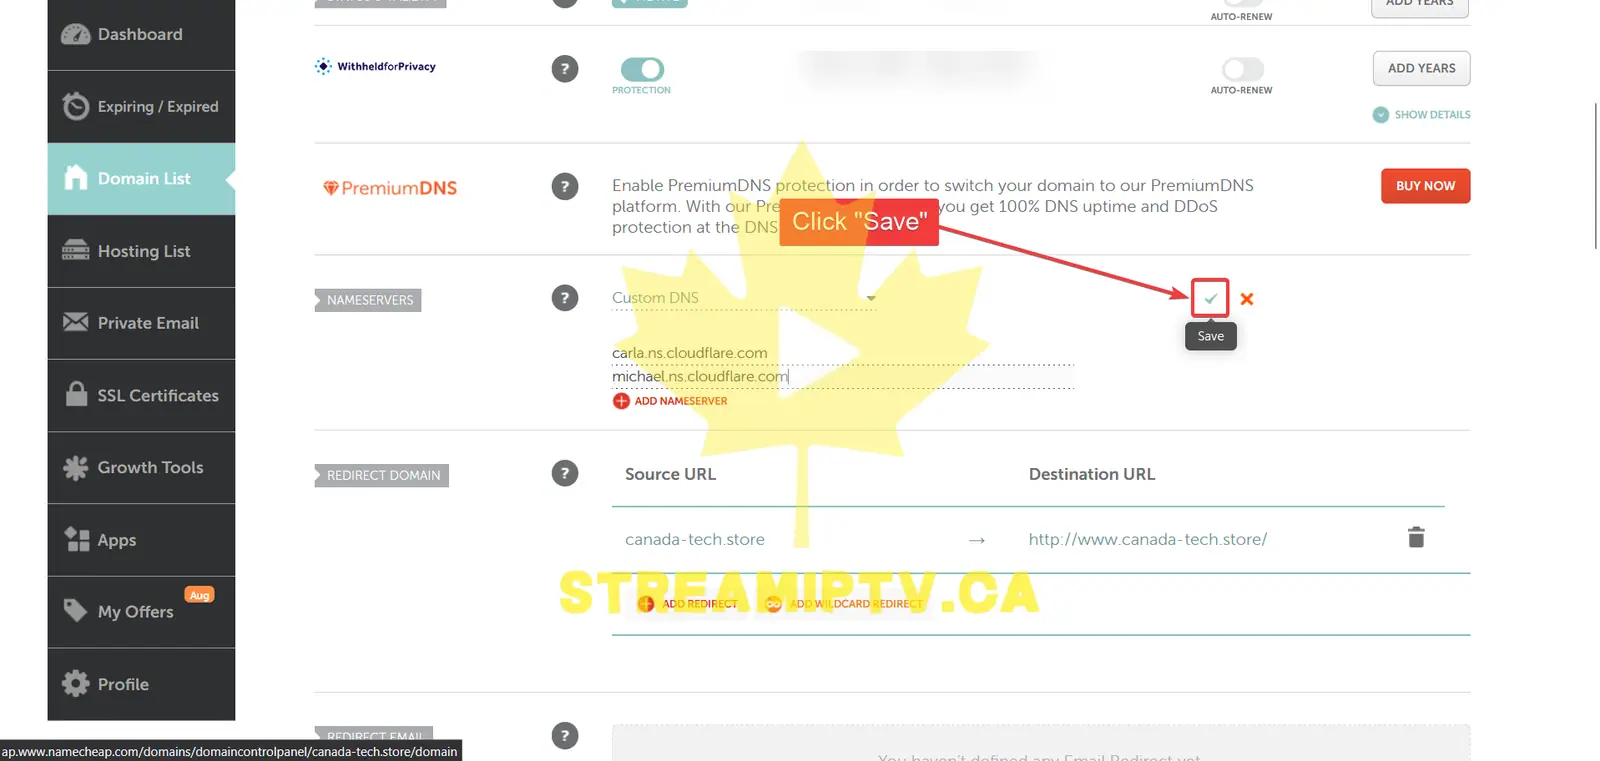
Check both nameservers, then click Save.
Do not repeatedly change the nameservers while waiting. DNS changes require time to propagate across the Internet.
Wait for the Success Message
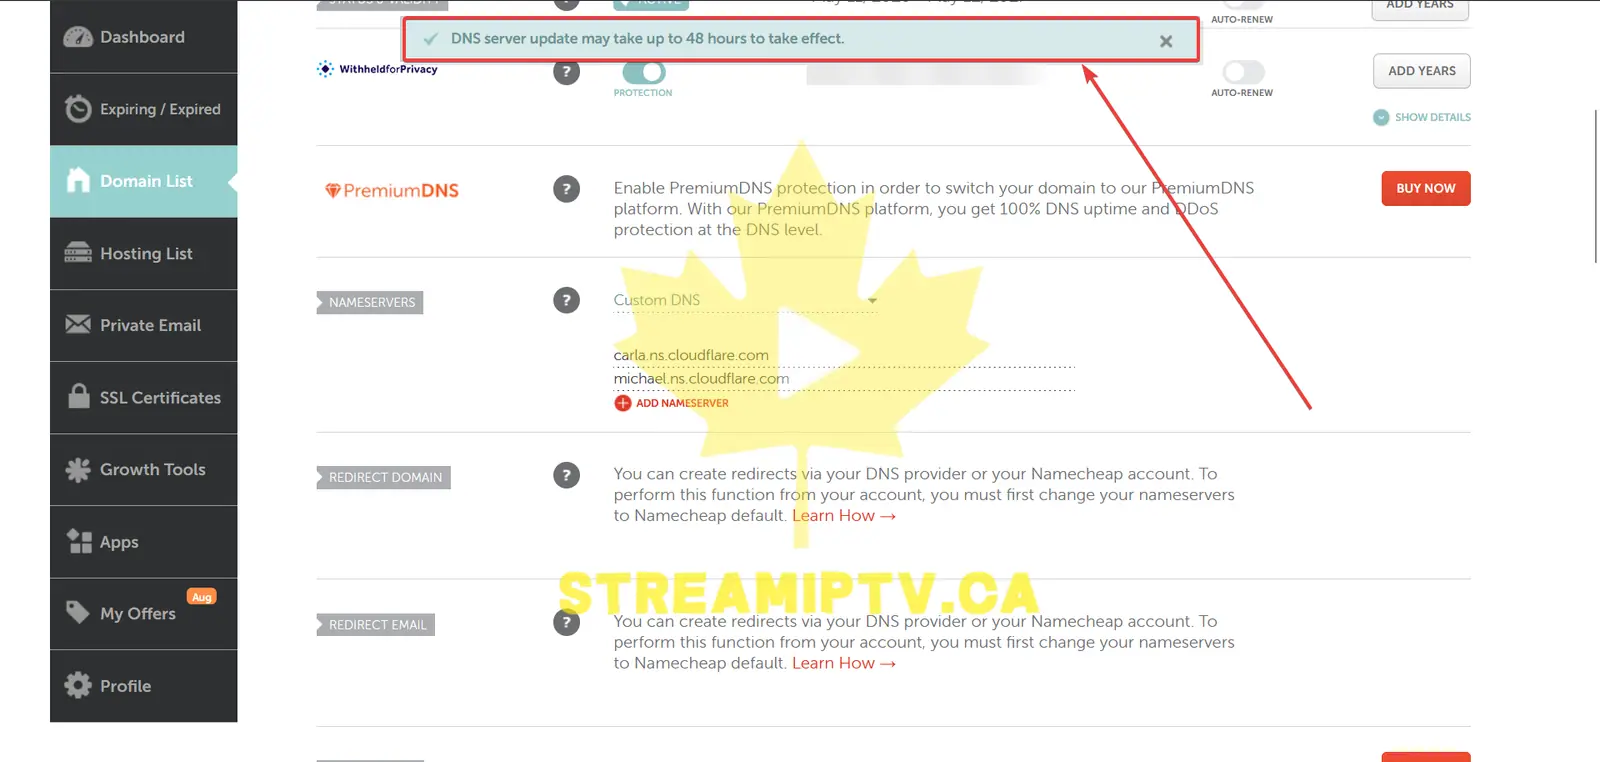
Return to your DNS hosting panel and wait until the domain shows a successful or active status.
🎉 Congratulations! The DNS configuration is complete.
Propagation can take from a few minutes up to 24 hours.
Once active, your hostname can be used as the server / Host URL.
Example: http://vpn.canada-tech.store
Important: The server port comes from your server/panel configuration and is not created by changing DNS.
If required, the complete URL can look like: http://your-domain.example:PORT
Security: If supported, prefer HTTPS instead of plain HTTP.
Final step
Your Connection Link Is Ready
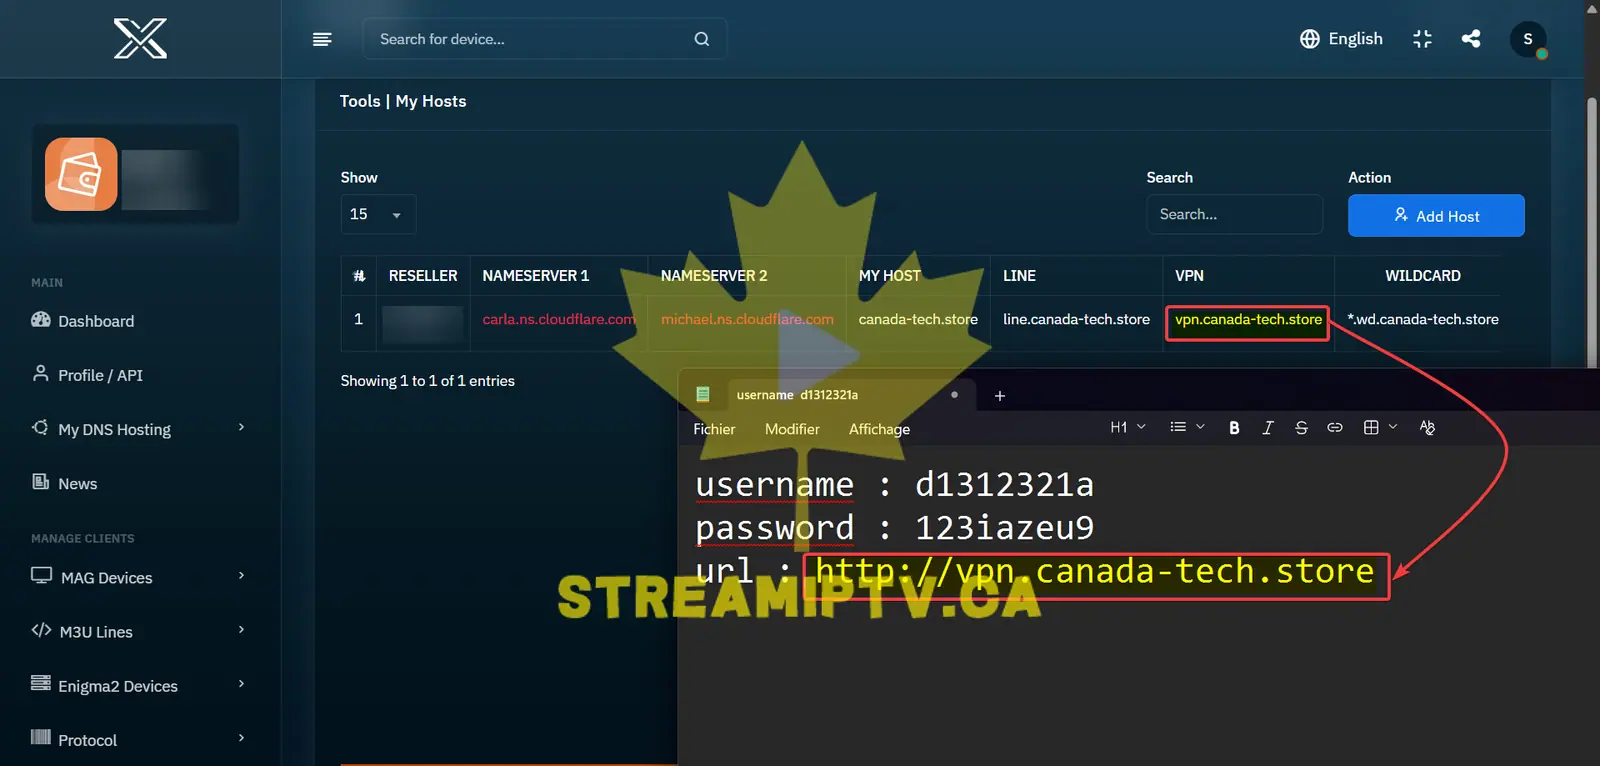
✅ All done! Your custom domain is now connected to your DNS infrastructure and can be used as your server hostname.
- Host URL: Your configured domain or hostname
- Port: The port assigned by your server/panel
- DNS: The nameservers connecting your domain to the DNS service
Example: http://your-domain.example:PORT
You can now provide the appropriate connection information to an authorized user of your service.
Comments (0)
Leave a comment